Friday, August 7, 2015
My Life is In The Weeds.....
Wednesday, November 19, 2014
Giving the Sweet Potato it's Due
Friday, August 8, 2014
Excuses, excuses.....
Tuesday, June 24, 2014
Gardening is For Risk Takers
Thursday, May 29, 2014
The Teepee is Ready to Go!
Wednesday, April 9, 2014
Garden Remodel and Mint Invasion
Saturday, July 6, 2013
The Blight Battle Begins
Wednesday, August 22, 2012
Tomato Wisdom
- You don’t have to do things the way everyone else does it. You don’t have to peel the tomatoes. If you’re making puree or pizza sauce, or even tomato sauce, just clean them super well, core and seed them, and run them through the food processor until they are liquefied. Skipping all that peeling saves endless time.
- You don’t have to stick to your plan. Use up the most ripe tomatoes first. Let go of your best laid plans and use up the over-ripe mortgage lifters first if the Amish paste tomatoes are still firm. Once a couple tomatoes start to rot in your containers, the fruit flies and ungodly stench descend. Get to work.
- Sometimes it’s best to put off until tomorrow what you really can’t do today. If you don’t have time and you are overrun with tomatoes, clean them really well and put them in plastic bags in your freezer. If they're destined to be sauce anyway, freezing them won’t hurt –promise. You can can at Christmas if you want. Or use them as you need them, provided you have the space to store them in the freezer. Our cow arrived a few weeks ago, so all the space in our freezer is spoken for.
- Cheating is permitted when there’s nothing at stake except your sanity. You can stretch out your work time by refrigerating your tomatoes. We’ve had them wait two weeks on us with very little loss by picking and putting them directly in the fridge.
- Even when you’re busy, it’s important to feed your children well. Plant cherry tomatoes and when your kids are hungry for a snack, send them to eat directly off the plant – saves time, dishes, and money!
| Using the deep fryer base to can outside. Water heats faster and it keeps the heat out of the kitchen. |
Thursday, May 3, 2012
Seedling Season
- Look for the healthiest plant possible. Rich, green color and stocky stems are always a good sign. Avoid the plants with yellow leaves, this means they’ve been subjected to a dry spell or sub-par nutrients. You don’t want the tallest plant either, leggy plants might have been looking for more light or been hopped up on too much fertilizer.
- Avoid plants that have obvious insect or fungal damage – chewed on leaves, funny spots. You don’t want to bring home the blight!
- Don’t buy from places that have miniature plants – meaning you don’t want a teeny-tiny plant with big flowers or fruit already starting. It’s not natural for them to be flowering so soon and could mean they’ve been artificially induced to do this (to make them more attractive) or they’ve been stressed out by too little water and sent out their fruit early.
- Buy the largest plant you can – not by plant size, but by root size. The plants in the bigger pots most likely have bigger root development and won’t have as much ground to make up when you plug them in. Those six packs of bitty little peppers for a buck-fifty are cheap for a reason. They’ll be way behind your other plants and may never catch up.
Monday, May 2, 2011
Don't Recycle That Newspaper! I've Got a Better Idea!
As my garden has gotten bigger, I’ve learned how to get the most bang for my buck when it comes to mulch. Before any mulch hits the ground, I cover the ground with a layer of newspaper. Our newspaper uses vegetable-based inks, so as it breaks down it won’t harm the soil. And it holds in moisture as well or better than conventional mulch. Here’s the best part about newspaper mulch - it’s free! (well, unless you count the money I spend on my subscription, but I’m a compulsive morning paper person so that would happen even if I didn’t need the paper for mulch!) We stock-pile paper all year long and what isn’t used for starting fires in the fireplace is used for mulch in the spring. We never have enough.
Newspaper alone is a great mulch and if it wouldn’t blow away I’d forget about buying anything else. I’ve heard of hard-core cheap skates who simply weigh down their paper with rocks. I admit to being more than a little vain when it comes to the appearance of my gardens, so that’s just a little too cheesy for me. After the layer of newspaper is thoroughly wetted (sometimes it is necessary to keep a hose handy and sprinkle as you go or the whole process becomes a comedy of errors), I toss out a thin layer of store-bought mulch, just enough to hide the paper and keep it from blowing away.
We do this newspaper/mulch trick around all our fruit trees, blueberry bushes, flower beds, and now our brand new “vineyard” (12 grape vines we’re testing out to see if our south-facing slope will be conducive to grapes). Last year we tested out how well the newspaper/mulch duo worked as compared to the mulch only by papering around half the fruit trees and then (because we had run out of paper) simply mulching around the other half. The paper/mulch half did a better job of keeping the weeds down. The mulch circles around the trees without paper seemed to shrink each week surrendering more and more of their ground to the encroaching grass (thus making it difficult to drive the mower around them without decapitating yourself).
I still don’t do much mulch around the “real” vegetable garden. I’m too worried about what might or might not be in the conventional mulch from the local hardware place. But this year I am going to try the red plastic mulch around my tomatoes. The last two years we were struck with the early blight and then the late blight. So, in the interest of getting no blight, we’re going to mulch our tomatoes. I’m curious to know if the theory that red plastic mulch will make your tomatoes ripen faster is true. Reading a few garden-nerd websites on line, there are a wide varieties of opinions on that, so I’ll have to see for myself. Look for a red-plastic report late this summer. (I know, I know, it’ll be hard to contain yourself!)
Meanwhile, happy mulch season. Maybe it’s time to subscribe.
Note: My husband knew I was musing on mulch and sent me the following article, pointing out that even if we aren't buying it for our gardnes, most of us are eating plenty of mulch!
In case people don’t know it, when they eat low fat foods they are getting their share of mulch…
http://online.wsj.com/article/SB10001424052748703834804576300991196803916.html?mod=WSJ_hps_editorsPicks_2
Tuesday, June 1, 2010
How Do You Do It All??
Here’s my secret. And no, this isn’t where I confess that I have a staff like Martha’s that swoops in with mulch and compost and designer plants. I wish. That’s right up there with Esmeralda the maid I wish I had. Last night after two children and one husband had literally run from the dinner table to make it to a baseball game, I was left staring at the ruins of dinner. My remaining child looked at me and shrugged his shoulders and then got up to leave too.
I sighed and said, “This is when I wish Esmeralda would come in and clean up.”
My son paused, having heard this before, and asked, “Mom, was there every really an Esmeralda?”
I told him, “Not really, but if there was, she would clear these dishes and then come back and wipe the table and pick up the black beans that your brother spilled on his chair, and after that she would do the dishes and even change the laundry that’s been sitting in the washer all day.”
He watched me carefully, perhaps wondering if I was in to the dope that has been reportedly flowing freely through the middle school, and said, “That’s too bad,” before leaving me with the mess.
My secret with all the gardens is to steal minutes. When I have yelled and yelled that it is time to leave for practice and no obedient children have come running, but several less-obedient children finally realize they don’t know where the other cleat is and there are no clean water bottles, I grab my favorite weeding tool and work on the strawberry patch while they locate the errant cleat and wash the water bottles.
When I get back from the school and realize I have 20 whole minutes before I need to start dinner, I grab my seed packets and markers and plant whatever needs planting.
In the morning after I feed the horses, when I’m not sure I want to wade back in to the fray of before school preparations, I’ll pick up a few thyme plants that are waiting to be transplanted from their pots to the garden and tuck them in.
When I’m on the phone with my dear friend in Idaho who I could talk to for hours, I balance the phone on my shoulder and use my stirrup hoe to clean up the areas between the rows.
The reason I can garden like this is- I leave my stuff out. I know that dad’s everywhere will cringe at this directive, but it works. I leave my stirrup hoe leaning against the pea fence in the vegetable garden. That way it’s where I need it whenever I have a free minute to weed. I do realize that garden tools last longer if you don’t leave them out in the weather. I’m sure that’s true. My garden hoe is over 10 years old and still works like a charm, so I’m willing to challenge the “put-the-tools-back-where-they-belong” commandment.
I also leave out my garden bin. It sits on the porch near the door where I can grab what I need at a moment’s notice. No, it doesn’t look so great with plant markers and empty yogurt container seed pots spilling out of it, but I’m not about that. Again, I’m willing to challenge the “the-porch-should-be-spotless-and-beautiful-at-all-times-just-in-case-someone-important-comes-to-visit” commandment. All the important people in my life garden or love what comes out of gardens and they’ll understand.
In my garden bin I keep:
• Seeds to be planted
• Plant markers
• Permanent markers to write on plant markers
• Small shovel
• Weeding tool
• Plants ready to go outside (if they are large I just put them where they will reside in the garden in their pots so they are ready to go when I am)
• The Seed catalog (so I can refer to it, if I have a question about planting or harvesting)
• Gloves (2 pair because one always seems to be wet)
Near every garden you will also notice a weed bucket left out. A weed bucket in our world is a manure bucket with holes drilled around the bottom rim (or cracks created when they are handled less than carefully when the weather was freezing). The holes and cracks are necessary because these beauties sit out in all kinds of weather and a bucket filled with weeds and water is not only ungodly heavy, it stinks to high heaven. I know the buckets are not so attractive, but once the veggies get going, you don’t really notice them.
This last thing is my real secret – the list. I keep a list on my kitchen counter of the current needs of my gardens. That way I don’t experience that deer-in-the-headlights feeling that can overpower me when I suddenly realize I have 10 minutes all to myself. If I don’t know what needs done, I scan the list and pick something. Right now the list says:
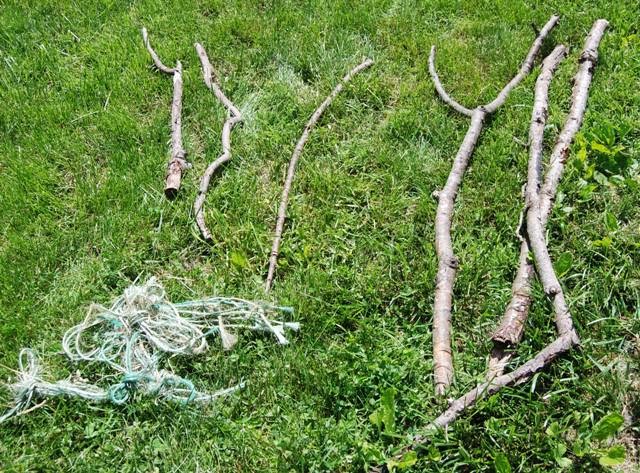
“Pick swiss chard and blanche, plant pumpkins somewhere, find sticks for bean teepee, weed the peas and corn, put the rest of the mulch somewhere, snip the bottom branches off the tomatoes, check the garlic & shallots.”
It’ll only take a few minutes to plant the pumpkins (after I figure out where I have room), and weeding the peas and corn can be done in spurts, so those are great 10 minute chores. The tomatoes are an “every time I walk by” chore. You have to be vigilant about the bottom leaves touching the ground this time of year (the blight is always lurking!). It’ll take longer to locate the right size branches to build the bean teepee, so that might require 20 minutes, and checking to see if the garlic and shallots are ready will take 2 minutes. I’ll need 25 minutes or more to pick the swiss chard and clean it and blanche it for freezing. I might need even more time to start the pick-up and clean out the remaining mulch from its bed (the bulk of this time being the starting the pick-up part). All these things will get done in between the rest of my life this week.
This is how I garden – a minute here and a minute there. If I waited for the hours, it would never happen. There are tradeoffs of course, the inside of my house doesn’t look so good, but that doesn’t matter so much since this time of year we’re all outside anyway.
Thursday, April 15, 2010
Five Cheap and Easy Plants Worth the Time and Effort
1. Basil (you can also easily start this from seed) – summer recipes always call for fresh basil and it’s silly to buy it when you can have some growing in your flower garden (they have pretty white flowers) or in a pot growing on your porch or in a sunny window. A packet of seeds (will last for years) or one small plant will cost you less than one bundle of fresh basil in the grocery store. Basil is an annual, so unless you cultivate it indoors, you’ll have to start over each year. But basil is so easy to grow it’s no trouble. You can freeze basil (pureed with a little water and frozen in ice cube trays works great, then you can just drop an ice cube in sauces or soups) or dry it to use throughout the year. There are lots of different varieties of basil out there – I really like Thai basil for the little kick, but cinnamon basil and lemon basil are also fun. And here’s the added bonus – Basil repels insects! I like to put some in my flower pots on the porch to keep the bugs away. (most strongly scented herbs repel bugs – thyme and lavender also work well, and of course, citronella). Harvest basil as soon as the leaves are large enough and it will keep producing all summer.
2. Silver Dollar Eucalyptus. Bet you didn’t know you can grow eucalyptus! It grows as annual in my time zone, but it does that beautifully. One small plant (I bought mine in the herb section of the nursery today for 1.99) will turn in to a huge bush that produces lots of fragrant stems. I grow it and cut some all summer to scent the house. When cold weather threatens, I cut the whole thing down and dry it in the basement before refilling several stashes I have around the house to keep it smelling nice. Note: in warmer climates Eucalyptus can be come invasive and harm nearby plants, also its bark is very flammable, so it’s not a good choice for fire prone areas.
3. Dusty Miller – if you want a cheap splash of bright white that lasts all spring, summer, and fall, choose dusty miller. It’s really just white leaves that give the color, but it can be counted on through heat, drought, and even the first few frosts. Last year mine was still blooming when the snow hit. It looks gorgeous as a border or add individual plants to your baskets and pots to add variety and dress up herbs.
4. Zinnias – the happy, bright flowers bloom summer in to fall and right up to the first frost. You can cut them to create beautiful bouquets and they come right back with even more blooms. One packet of seeds will create an entire garden of pretty blooms. They like sun and are forgiving when you forget to water them. I like the Cut and Come Again variety, but they come in all shades and sizes. Great flower to get kids started. It’s also incredibly easy to save their seeds for the next year. Wait for the flower to truly die (turn brown) and then cut them off and put them in paper bags to dry. When they are dry, just shake out the seeds. One packet of good heirloom seeds could last you a lifetime!
5. Zucchini – you really only need one seed to grow enough zucchini for the neighborhood, so one packet will last you for years. These squash grow practically overnight. They create a nice-looking “bush” of giant leaves and yellow flowers, followed by more zucchini than any family can ever eat. Zucchini is a great vegetable to hide in your kids’ food. It sweetens when it cooks and is pretty much undetectable in pancakes, brownies, chocolate cake, spaghetti sauce, and salsa. I puree it so no one finds the telltale green skin or heaven forbid – a lump! A zucchini among your foundation garden will look exotic. This is a great one for kids to grow.
Tuesday, April 6, 2010
Ready, Set, Garden!
I haven’t been able to clip the wings on one of our roosters and yesterday I caught him in the garden digging up and eating the seeds I’d just planted! Hugely righteous anger. The kids got water cannons for Easter from their grandparents so I appropriated one to keep on the porch so that I can shoot the rooster whenever he makes his way to the garden (which is twice so far this morning). I’m not sure you can train a chicken, but I’m certainly going to try. All the chickens have been sentenced to living in the chicken pen once again since the garden has begun. It’s a tough adjustment after 7 months of free range life. Some are able to fly over the fence (yes, chickens really can fly- but only about 5-6 feet up and they do much better if there is a hill to give them a running start and a gravitational advantage.) To remedy this problem, we clip their wings which doesn’t hurt and isn’t even visible (their “flying feathers” are hidden behind their “standing around looking like a chicken feathers”). Only problem is none of us can seem to catch the big rooster. It doesn’t help that his spurs are huge and he just looks mean. He’s never hurt anyone and he has the wimpiest crow around, but still. I’m going to try to do it tonight when he’s sleeping.
How do you know when to start your garden? The weather’s been beautiful and it’s very tempting to start tucking in all your seeds. For sure there is still cold weather to come so I wouldn’t chance a tomato or a pepper yet and the soils not warm enough for cucumbers or squash. Seeds need the soil to be about 55 degrees to germinate, some need it warmer. Lettuce and peas like it cold. Tradition says you should plant your peas on St Patrick’s Day, but we were still under snow cover on St. Patty’s day this year.
Another good way to know when you can start planting is the texture of your soil. You want your soil to be like chocolate cake not chocolate fudge. So that’s basically it – chocolate cake that is about 55 degrees and you’re good to go with lettuce, carrots, radish, peas (all kinds), spinach, broccoli, onions and any other seed whose packet lists “as soon as the soil can be worked” or “early spring” as the planting time.
If we get a forecast for a serious frost and freezing temps overnight, I sometimes cover my rows with plastic. But sometimes I forget and they do just fine. Here’s a few other tips for planting that I’ve learned the hard way.
The distances between plants suggested on the seed packets are for real. Sometimes I read them and think they’re being overly cautious. I always live to regret this and end up stepping on plants as I try to weed and performing acrobatic feats just to water the veggies.
Mulch or cultivate the soil between rows on a regular basis. This is how you keep weeds from getting ahead of you. A great tool for keeping the weeds in check is a stirrup hoe (looks like a stirrup on the end of a stick). There is no shame in mulch. If you can save leaves in a pile each fall to use for this task you’ll save money. Straw works OK too, but things creep in. Newspapers are good if you can get them weighted down with water and maybe some stones until they start to disintegrate. (Check to be sure your paper uses vegetable based inks. For you locals – the York Daily Record does use vegetable based ink.)
Don’t plant too deep. I’ve committed this crime many times. It usually happens when I’m planting a lot of seeds in a hurry and use a hoe to fill the row back in. The general rule of thumb is to cover the seed with soil as deep as the seed is big. Most seeds are pretty small. You don’t need much soil over them. The best way to do this is by hand and carefully, patting down the earth over the seed as you go. If you plant too deep you’ll wait much longer to see any action and some seeds won’t make it at all.
Put up big signs. You think you will remember where your rows are. You think you will be able to see the little popsicle stick markers. You assume that digging the seed packet in to the soil at the end of the row will help you remember what’s planted there. Here’s what I know – my memory is fading (I don’t know how old you are, but odds are you are no longer a teenager, so yours is on the downward slope too). Popsicle sticks quickly become camouflaged by the dirt, upended by the trampling feet of children and pets, or blown away when the soil begins to dry. Seed packets disintegrate almost overnight and the wind tends to blow them away. You need big signs – I use scrap wood and paint stirrers (free at the hardware store!) and use paint pens to label them. My daughter and I like to write inspiring things on the backs of these signs too. (See my post April 15, 2009 “Planting Seeds and Inspiration”). If you don’t label your rows well, you may mistake newly sprouted lettuce for a weed (lettuce basically is a weed so this is understandable).
Stay on top of the weeds. Don’t wait for them to overwhelm you. Pull a few EVERYDAY and it won’t seem too bad. If you enlist your children’s help (and you should), supervise their weeding or you may lose more than the weeds. Personally, I haven’t had a whole lot of luck putting the kids to work. They are happy to pick, but weed only under duress for large sums of money. Wish I could tell you different, but I have to be honest.
Plan your walkways as carefully as you plan your planted rows. You need to have somewhere to walk – remember that tomatoes get very bushy and pushy, cucumbers and squash can sprawl all over, and carrots and onions will keep nicely to themselves (but don’t handle being stepped on very well). I’m hoping to make some homemade stepping stones this year with the kids using small pizza boxes and a bag of cement. We don’t order out pizzas, so we’d love some donations from those of you who do (hint, hint).
Put up posts on all the corners of your garden to keep the hose from being dragged over your plants. After all that hard work and diligent weeding, it would be a shame if a hose snapped your almost ripe red pepper plant in two. This is a MUST do. We put four foot tall metal fence posts on the corners (shorter stakes tend to do more damage to my shins).
I’m sure there is more to say, but I’m watching a rooster making his way towards my pea row, so I’ve got to fill my water cannon. Happy gardening!
Thursday, March 18, 2010
Worms From Heaven
One of those projects was moving the hay delivered during the blizzard from where it’s been sitting under a tarp on the driveway (the only place accessible for the hay guy at the time) to the barn where it belonged. I was tired of lugging the 50 lb bales of hay up the hill to the barn every day. The big storm we had over the weekend had pulled the plastic tarp off the hay so now the bales weighed much more than 50 pounds, soaked as they were. Lucky for us the storm also washed away nearly all of our mammoth snow fall. So my husband and I loaded all the hay in to our little pick up and after several trips had the hay neatly piled in the barn. The miracle occurred when we picked up the pallets that were underneath the hay pile. Below the pallets, squirming all over our driveway were hundreds of worms! Free! All we had to do was scoop them up, which we did, loading them in to the back of a plastic dump truck that was handily abandoned in the driveway by one of the kids.
We laughed at our luck. There was only one moment when I was kind of grossed out at the idea of touching all these worms. That happened when I was holding the worms for the picture my husband took and I felt several worms “worming” their way between my fingers to dangle below my hand. Ehhh! I deposited the worms in the compost bin and could almost hear them shriek with happiness. They had spent the previous month under a pallet on our cold cement driveway and now they had been dropped right in to a larger than life smorgasborg. They must have felt like the messiah had come and carried them right to the Promised Land. Another win-win in the natural world.
If you compost you need worms. I don’t think you need to store a half ton of hay on your driveway to attract them. I bet you could leave a piece of plywood on your driveway through a rainstorm or two and you’d find plenty. Worm catching would be a great “chore” for your kids too – I’m sure they can find a few hiding under rocks or under the leaf layer in the woods. (Just be sure they aren’t harvesting worms from your garden!) When you consider that worms cost about eight cents each in a catalog, I think you’d be getting a bargain if you offered five cents – and the shipping would be free!
I’ve been shaking my head and smiling to myself ever since we received our worms from heaven. It’s very easy to spend your fortune on garden gadgets. In fact, that’s kind of second nature to us Americans. We always want the latest, greatest, quickest fix. My husband works for a tool company so he’s all about having the “right tool for the job”. And having the right tool for the job does make it easier. But all those tools, gadgets, boxes of worms, etc., add up in terms of the money you spend, the piles of stuff you accumulate, and the disappointment you feel in your soul. Why do we always need more/new/better stuff?
I learned that lesson all over again this weekend with the worms from heaven. Look around, open your eyes. Maybe what you need is already all around you. It may require a little work and resourcefulness, but it will feel much better on your wallet and your heart to use what you have – or what your neighbor has. We’re headed to a neighbors later this month to borrow his splitter for the trees the storm pulled down. And we’ve already begun trying to figure out which neighbor is most likely to have a pressure washer we can borrow. The father of one of my daughter’s friends called us up yesterday and asked if we wanted the cherry wood from a tree he had cut up for a job he’d just finished. (He’s a hardworking landscaper/do-any-job-outside guy if anyone wants a referral) We heat with wood, so the load of wood he dumped on the driveway (where the worms appeared!) will heat our house for a week next year.
Another great way to keep costs down when it comes to gardening is to swap seeds. Most seed packets hold way more seeds than an individual gardener needs. Nobody needs 25 zucchini plants. Order with a friend and share the seeds. Some gardening clubs organize seed swaps, but you could also organize your own. Our local library is having a plant swap this May. I’m already growing all kinds of extras to take and swap.
Gardening, and living organically for that matter, shouldn’t be expensive. It certainly doesn’t have to be. Look around you. Talk to friends, neighbors, and farmers in person and online. Offer to share your resources, labor, knowledge and you’ll be surprised how much stuff you can get for free!
Tuesday, February 2, 2010
Starting From Seed
First thing you need is a place to start seeds. This can be big and fancy and expensive and purchased through some big and fancy gardening supply company, or it can be a simple book shelf with a grow light affixed to the top of the shelf. Some people also use a sunny window. I haven’t got a sunny window available that is safe from children or critters, so I stick to my homemade light box in the basement. Sunny windows can also be too cold for some seedlings. My box (pictured) is a simple coffin model made out of plywood. A light is hung by chains that descend through a hole in the top of the box. I can raise and lower this light simply by pulling the chains up through the hole and securing them with my high tech 10-penny nail, but you can also use a stick or pencil. The advantage of raising and lowering your lights is that you can keep them close to your plants and raise them as the plants grow. Lights that are too far away from the plants can grow pretty spindly seedlings. The side of my coffin/grow box is removable so I can access the trays of seedlings.
Of course I outgrew that box, so on the top of the box we created another grow area for older seedlings that don’t need as much warmth. These seedlings grow under lights that descend from the ceiling. I can start several hundred plants this way. Basically you need a place where your seeds will have access to light 12-16 hours a day and be relatively warm and out of harm’s way. You also want to put them somewhere you won’t forget about them and neglect to water them. Oh, one more thing – you need a light timer unless you think you can remember to turn on and off your lights every day. (You can’t. Really, you need the timer.)
Once you’ve secured your growing location, the next step is containers, growing medium and of course, the seeds. There are many systems for seed starting that can be purchased through garden centers and hardware stores. I’ve tried quite a few. I don’t recommend them. The seed “pellets” are basically compressed seed starting medium that will get your seeds started, but take them no where else without a lot of help. I once used seed “tubes” which were long skinny tubes of compressed seed starting medium which reminded me of the test tube shooters they used to hand out in bars at happy hour (do they still do that? I’m so old and beyond the bar scene, I wouldn’t know. Happy hour to me is about 9:30 at night when the last kid has gone to bed.). The seed “testtubes” really were super space efficient, but fell apart when I went to transplant them. I’ve also tried making homemade pots out of newspaper, which I liked because of the whole re-purposing/recycling angle, but was actually a lot of work and pretty messy. I suppose you could buy plastic seed starting containers or re-use containers you purchased seedlings in (if you save them). What I use is old yogurt containers. They are the perfect size and abundantly available. I use a drill to poke three little holes in the bottom so they will drain. I use the tiny yogurt containers to start onions because they don’t seem to need as much space and I need to start so many onions. If I’m starting a new tomato, I might use a sour cream container to give it plenty of room, but mostly I use the regular size 6-8oz yogurt container. When I’m finished with them I rinse them and stack them and can use them again.
When it comes to dirt, I make my own. The seed starting mediums that are out there drive me nuts. They are too light and don’t retain water so well and are only meant to “start” seeds, not grow them. So if you use a straight seed starter from the store, you’ll need to transplant your seedlings to a growing medium as soon as they are viable. I only want to transplant my seedlings once – when I put them in the garden. There’s too much danger of hurting the plant when you move it, plus who wants twice the expense and twice the containers? To start and grow seedlings I use organic spaghnum moss mixed with organic potting soil. You can also add vermiculite and/or compost if you have it. I always seem to forget to buy the vermiculite and I save the compost for the garden, so although I have other intentions, every year I seem to use the moss and the soil and it works out fine. The moss keeps the soil light and allows the seed room to get going and potting soil feeds it as it grows in to a hardy seedling. This works for me, but you do what you want. Either way works, I’m just all about keeping it simple.
Before you put your precious seeds in to your growing medium, you need to prepare the soil. I fill the pots and even tuck in the label of what I’m going to plant (popsicle sticks work great for labels and can be used at least four times, once on each end). When they are ready, I place the yogurt containers in plastic trays (re-purposed under-the-bed boxes). I fit the yogurt containers snugly against each other so they won’t float when I water them. Then I moisten the soil by filling the trays they sit in with water so that the pots can soak up moisture. When the top of the soil is moist, I’m good to go. You have to pay attention to how much water you use because you don’t want waterlogged soil. Misting the soil from the top only succeeds in getting the top wet and will quickly dry out. As long as you’re cool with misting several times a day, that’ll work. I haven’t got time for it so I water from the bottom. Keep the trays somewhere warm. Ideally you want the soil to be 70 degrees, but my house won’t be that temperature until June, so I cover my soil with plastic wrap and hope for the best. I’ve been able to start nearly all my seeds with this method, so I’m fairly certain the 70 degree idea is a fairy tale.
Some seeds benefit from being soaked for a few hours or overnight. Read your seed packet or check out a copy of Rodale’s Ultimate Encyclopedia of Organic Gardening, a great resource. If you’re serious about organic gardening you’ll need to budget for buying a copy. It was revised recently and will set you back $25 new, but it’s been in print for 50 years, so I’m sure you can pick up a used copy for much less.
Germinating most seeds doesn’t require any light. I plant my seeds and cover the trays with plastic. Then I place the trays in the warmest room in my house. Once a few little green noses poke out of the soil, I move them to the light box. From there it’s just a matter of monitoring the moisture in the soil. I generally plant 3 or 4 seeds to each container and then thin them out later, keeping the strongest plant.
Timing is pretty critical when it comes to deciding what to start when. You need to know your last frost date for your area. From there you count backwards. Onions need about 12 weeks and can be planted when the soil is still cool, so they’ll be hitting the pots this week around here. Tomatoes can’t go in until the soil is warm, so I won’t be starting them until late February/early March. If you want to try your hand at growing annuals, you need to start soon. Impatiens and pansies take a good 12+ weeks to get started. This is where a good book on gardening comes in. Figure out what you want to grow and develop a timetable for making it happen.
Growing your plants from seeds is not only much less expensive than buying plants, but it increases your options – you can grow just about any variety you can find a seed for. When you purchase your plants already started, you have a much meager selection, plus you don’t know how they were raised. I haven’t really seen any organic plants for sale at the garden centers in the past few years. Maybe they’ll have them this year, but you can bet your bottom dollar they’ll cost twice what the traditionally grown plants will cost. So there’s price and selection to consider, but there’s also the satisfaction of doing something yourself. That’s priceless. And you can do this. Starting plants indoors from seeds is not difficult. No master gardening degree needed. I promise you’ll enjoy the time spent nurturing your “babies”. I cherish the time spent in my basement, all alone with my plants and my dreams.
Tuesday, October 13, 2009
Marshmallows, Lasagna, and Cover Crops
Nobody’s garden looks good this time of year. Everything is brown, withered, and dotted with weeds. A few things are still growing. I was careful to keep the fire away from the lettuce, spinach, and peppers that are still doing their best in our garden. The peppers we are getting this time of year are small and funny-shaped. The hot peppers have all turned bright red – even the jalapeños. I know that any morning now I will walk outside and find them all shriveled from the cold and liquid inside. Before the fire yesterday, I picked every pepper I could find. I washed them, cut them in half, and seeded them. Then I filled Ziploc bags with them and put them in the freezer. According to the book, Stocking Up, the classic preservation guide by Carol Hupping, it isn’t even necessary to blanche peppers before you freeze them. The book does say you can blanche them if you feel compelled. I’m all for easy, so I’m taking my chances and freezing them without the blanching. I’ve also roasted peppers before freezing and they’ve worked out fine. I’ll let you know how the naked peppers turn out.
Besides burning the garden, there are other things to be done to prepare for next year. It’s very tempting to leave the skeleton of the garden lying until spring. After all, nothing’s going to grow there, right? Wrong. With a small effort this fall, you can have luscious, rich soil in your garden next year. Here are two options.
Lasagna gardening. Ever since learning about lasagna gardening about eight years ago, we’ve been using it each fall to enrich our current beds and to add new ones. It’s a great way to re-purpose all kinds of yard waste and works like a charm. Lasagna gardening is simple. You select a new spot for a garden (or cover the current garden space. This is how I secretly enlarge my garden a foot or two each year. Slowly I’m taking over the entire yard and no one notices!). Cover the space with a thick layer of newspaper. Don’t use the glossy circulars, stick with plain newspaper. It’s best to do this on a calm day. Wind makes this task pretty difficult (although it does make it an amusing spectacle for your neighbors and terrifying one for the cats).
After the paper is down, wet it thoroughly with a hose. Next, layer on whatever you want – compost, pine needles (unless your soil is already pretty acidic), leaves, grass clippings, wood ash, horse manure, more paper, peat moss, etc.) Basically, you want to layer “brown” (dry dead stuff or paper) and “green” (compost, fertilizer like stuff – you can even use liquid fertilizer). We keep adding layers right up until Christmas and then leave it alone until spring. The winter cooks the lasagna garden and creates rich wonderful soil by spring.
The best part about starting new gardens with lasagna gardening is you don’t have to dig up the grass to begin a garden. Just put down the paper and start layering. I’ll never “dig” a new garden bed again. Lasagna gardening is great on an existing beds because it kills off any weeds and continues to keep them down in to the summer. You just dig right down through any layers still visible to plant. But the best thing about lasagna gardening is it’s free – you (or your neighbors) already have everything you need to make a rich, organic garden bed by spring.
The other option for the winter is to plant a cover crop. We’ve never done this, but after reading about it, I think that’s been a mistake. In my quest to figure out how to rid our ground of the blight and how to make our soil healthy, I learned all about cover crops. Leaving your garden bare is a huge loss. By planting complimentary winter crops in your garden you can improve your soil, adding nutrients lost from summer crops. It also keeps out the weeds, and, maybe best of all, it looks good all winter. It’s inspiring to drive by a field of winter wheat – all emerald green against the barren landscape around it. That will be my garden this winter. After we till up the burned ground, I’m going to plant cereal rye grass.
You can solve a whole host of soil problems by planting the right thing in winter. Plants that have long root systems help to aerate your soil and loosen it up for the plants to come, creating tunnels for the next crop to follow. In the spring when you till or harvest your winter crop, the root system will die off and create soft porous soil for the plants that follow. I’m hoping that will help my carrots to grow straight – they are normally forked or bent, we even get perfect right angled carrots due to the rocks and hard ground down below the surface. It’s a great freak show, but they’re difficult to peel. Check with the extension service in your area or a good seed/feed store to find out which cover crops work well for your zone.
When it’s time to take down a cover crop it’s easiest to till it under, but you can also hoe it or pull it up for your compost pile. If planting a cover crop makes you nervous, try a small one first. You can and should plant cover crops on your empty areas in the summer too for all the same reasons. I hadn’t thought of it as a cover crop, but I always try to plant something in every bare spot, even if it’s just gourds. Barren garden left alone is a haven for weeds and that doesn’t do you or your garden any good. Marigolds and sunflowers are also excellent quick growing cover crops. I stick marigolds in any empty spots for their color and bug repelling properties, but they also get big and crowd out any weeds that try to infiltrate.
I know you thought you were finished with your garden, but do this one last thing and then you can be done. (Unless you want to plant garlic –more about that later) Plant a cover crop to enrich your soil or lasagna garden it. Do one or the other and the pay off will be rich. As always, get your kids involved in this process. They can learn a lot if you explain why you’re planting something for the winter and they’ll love the idea of planting a lasagna garden!
Wednesday, September 2, 2009
Seed Saving Saves
Finally, I’m posting about seed-saving. I’ve meant to write about this for some time, especially since many of the seeds that you can save are probably long gone. Still, there’s lots left to save. Normally, I’m a big seed saver. It just seems so self-sufficient and Laura Ingalls-like. But this year with “the great tomato blight”, I’m feeling a little hesitant to save anything that might be contaminated. I’m leaning towards only saving flower seeds and avoiding anything that grew in the same garden as the tomatoes, but you probably aren’t facing this dilemma, so let me get right to the details of seed saving.
Seed saving is very simple, really. The most important thing to remember is to be sure your seeds are completely dry before you store them. If they aren’t they’ll mold and die quietly while you are certain they are tucked away safe in their beds ready to brighten your garden next spring. If you are a real seed saver you can save seeds from virtually any plant. I’m more of a basic seed saver and I save only the ones that are special to me or are incredibly easy to save.
Another critical piece of information: You can’t save seeds from hybrids or genetically engineered plants. Well you can, but if they’re hybrids they’ll be one or the other of their grandparents, but they won’t be what they came from. I’m sure that makes no sense, but think about it and maybe it will. Many of the engineered seeds just plain won’t grow. They’re designed that way so that you have to go buy new seeds from the seed companies each year. This is one of the criminal practices that put small farmers out of business. Even if the seeds would grow (and a few would), it’s illegal to save them because they are patented. If you plant your own seeds in a field next to a field planted with designer, patented seeds and they pollinate each other, you can’t save your seeds that year even if they were your own to start with – again, it’s illegal and farmers have been prosecuted for this. Big agri-business is as territorial as the mafia. So, buy heirloom seeds and start saving them to ensure their survival.
I would encourage you to enlist your children’s help on this endeavor. First of all, it’s a great living science lesson. Second of all, children love treasure hunts and that’s what this is. And third of all, anything that gets them interested in gardening is a good thing.
Here are some of the things you’ll need to get started: Clean bowls, clean newspaper, clean containers (preferably dark colored). That’s pretty much it. There is some fancier seed saving equipment, but for now you don’t need anything you don’t already have.
The basic steps of seed saving are thus:
1. Locate and gather the seeds
2. Clean the seeds if necessary.
3. Spread the seeds out to dry on newspaper.
4. Put the seeds in a sealed container and LABEL them. (Trust me you won’t remember what they are. You won’t. Please take my word for it. Even if the container is a really special tea canister.)
5. Store in a cool, dry, dark place. (I’ve used refrigerators, but a drawer in a cabinet in a dry basement with a dehumidifier is best)
When gathering seeds from flowering plants, wait a few weeks after flowering until the flower has faded and the petals begin to drop, that’s when they’re perfect for harvesting. When you locate the seeds, it’s sometimes easiest to gather the seed pods in paper bags and bring them back to your work space to actually loosen the seeds. Flower seeds will not need to be washed. You can simply spread the seeds out on a drying tray or newspaper and let them dry. Most seed saving instructions make a big to-do about getting rid of the chaf (unnecessary flower material that accompanies some seeds when you gather them), but I don’t worry too much about the chaf. If it’s easy to separate, I do, and if it isn’t, I dry it with the seeds. I then store it with the seeds and figure it’s just more compost when it’s time to plant.
For most edible plants (i.e. peppers, tomatoes, garden veggies of all sorts), you want the fruit to remain on the plant for a week or two past its prime. This is true for all of the veggies I’m going to mention except pumpkin and winter squash. When you are gathering the seeds from vegetable plants, you’ll want to put them in a bowl with water and allow the bad seeds and pulp and what-have-you to float to the top. Leave the bowl out for 2-4 days, but be sure to stir the bowl at least once a day to keep mold from forming. (I know this seems nasty, so don’t start a big seed saving project the day before you’re hosting a Ladies luncheon or birthday party for a 3-year-old.) Once the seeds are finished soaking scoop out the good seeds from the bottom of the bowl and spread them out to dry on paper. I know there’s an analogy about the good seeds and the bad seeds in there, but it’s not coming to me.
I’ll give you some simple directions for a few of the seeds that I’ve collected successfully in the past. I’d encourage you to take your kids out and see how many kinds of seeds you can collect. There are thousands of options. You can even collect seeds from wildflowers and perennials, and certainly trees. You’ll have fun with this project and next spring it will be exciting to see what worked. You can start the seeds inside in late February just when you’re pretty tired of winter and ready for some spring.
Tomatoes:
Pick a really good tomato that looks gorgeous and is so ripe it might just start leaking all over your counter. Scoop out the seeds and whatever pulp comes with them and place them in a bowl of water. Once the seeds have finished their soaking regimen, spread the good seeds out on strips of newspaper (skinny strips) and let them dry. When they are finished you can just roll up the newspaper and put it in a sealed container. In the spring when it’s time to start planting, just snip off a seed with paper attached and plant it. Great trick, huh? I’ve found some seeds stick and some don’t, so I collect the ones that don’t in a container. I’ve also used paper towels (good organic, non-perfumey, non-colored kind) because that seems healthier than newspaper with all its ink. Especially if I plan to share the seeds.
Peppers:
Choose a pepper that has over-ripened and deeply colored. Cut open your pepper and remove seeds. You shouldn’t need to wash these seeds since they’ve just come from a sterile place. Simply spread them out on paper and dry them.
Pumpkins (melons, zucchini, cucumbers are the same except you want really ripe fruits) – scoop out seeds and place in water bowl. Separate the good seeds from the bad (per above) and dry seeds really well. Bigger seeds take longer, don’t forget.
Beans and peas– Allow the beans to dry on the plant. They should be so dry they rattle when you shake a seed pod. This could take 6 weeks or more. If they are close to being dry and you expect a big storm, you can lift the plant (root and all) and put it in a dry place to finish drying out and save it from the rain. You won’t need to rinse these seeds.
Marigolds –These are probably the easiest seeds to save. You should never have to buy marigold seeds again unless there’s a cool variety you’d like to try. Wait for the flower to die and the stems to begin to get brown and stiff. Then pluck the flowers off the stems and take them to your working area. Spread out a newspaper and rub your fingers back and forth on a bloom and see all the seeds release. You’ll recognize them. Marigolds have that distinctive black end and look like tiny sticks. I’ve had years when I was in a hurry and simply grabbed the blooms off the plants and filled a paper bag and then hung the bag to dry in the basement. Come spring I pulled the bag down and released the seeds and they did just fine. Still, the organized seed drying and saving plan is probably best.
Zinnias – Are just as easy as marigolds. Save lots of colors, but be prepared for them to come back in shades you don’t expect. Mine tend to come back all pink. I’m going to work hard this year to keep my Green Envy Zinnia seeds separate. I planted them away from the other zinnias, so hopefully there was no unplanned pollinating going on. We’ll see next spring, I guess.
Petunias – The seeds are in the little seed “capsules” that you’ll notice on the stems below the flowers. I don’t know a better way to explain, but look and you shall see, I bet.
Snapdragons – Also found in seed capsules that grow under the flowers (where the earliest flowers were).
Poppies – the flowers turn in to giant seed pods with a gazillion seeds in them.
Sunflower – I think you can figure out what these seeds look like.
So, happy seed gathering! And don’t forget this is important work. Gathering seeds ensures that heirloom vegetables and flowers are here for generations to come.
Monday, May 11, 2009
The Babies Are Moving Out
I firmly believe in “hardening off” my baby plants. This means moving them outdoors in a gradual way to get them used to the wind, temperature, and the strong sun which is so different from the fluorescent lights they have been raised under. Even store bought seedlings can use a little hardening off. If I had a sunny window I would start by letting them spend some time there. Alas, the only really sunny window is in my six year old’s room and that might not be the safest of surroundings. So I move them outside in to the shade on my porch on a warm day for an afternoon. From there I increase their time outside and their exposure to real sunlight a little each day. Eventually graduating them to sitting in their bin together over the very spot I plan to plant them. If the temperature threatens to dip low, I bring them in for the night. This takes about a week.
At this point I watch the weather. The last frost is supposed to be somewhere around tax day (April 15) for us, but we always seem to still get a few frosts after that down in the hollow where we live. I shoot for Mother’s Day for tomatoes and peppers and other warm weather plants. I want to be certain the temperature won’t go below 45 at night. I’ve got too much invested in my tomatoes (all 24 of them) to risk a cold night ruining my hard work. Ideal conditions would be daytime temps around 70 and not too sunny with some light rain. But life is not ideal now is it?
Planting seedlings is careful work. Water your seedlings thoroughly so that when you lift them out of their pots they soil will stick to the roots and not crumple away. Lay out where you are planning on putting them and prepare clear markers so that other folks who traverse your garden won’t trample on them. Like so many other things that look great at home, once you get them out of their element they seem incredibly small and fragile. Surround them with a string fence or deliberately mark them with large stakes.
Dig the hole larger than the seedling pot and be sure the soil you are planting in to is moist. If it isn’t, water the hole before planting the seedling. If you have compost to add, work the compost in to the hole also.
My favorite plant store (Landreth Seeds) is having their annual sale this weekend. I will get up early to be one of their first customers on Saturday. As much as I enjoy saving lots of money raising my own seedlings, it’s still at thrill to buy a few “foreigners” to plant. This week I’m also going to harvest some of my “volunteer” lettuce that grew from the lettuce I planted last year and let go to seed. That’s the beauty of heirloom seeds, you get lots of volunteers. I’ll let you know how that works out. I’ve never thought of lettuce as a perennial, but this year it is for us. Gardening is such an adventure. You learn something new all the time.
Tuesday, February 24, 2009
Growing Your Own: Seed starting
First of all, if they weren’t pretty hardy, they would have died out years ago. Second, if they didn’t produce great tasting vegetables, no one would have bothered passing them along. So I recommend buying heirloom seeds whenever possible. I’m blessed because I live in the same town as the oldest heirloom seedhouse in America – Landreth Seeds (http://www.landrethseeds.com/). But you can buy heirloom seeds in most garden stores and certainly, by mail order. You can also save your own seeds each year and trade with your friends. Saving and trading seeds is a bit of a cult, you may discover. I save mine each year and store the seeds in plastic medicine bottles stored in my basement. Saving seeds is easy. Collect them, rinse them, and dry them thoroughly. I put mine in paper lunch bags and hang them in my basement near the de-humidifier for several weeks. Store them in a dark, airtight, dry place. Nothing easier – you may never buy seeds again!
Just don’t save hybrid seeds, you never know what you’ll get. Hybrids come from two different parents, so the next batch could be one or the other or a bad combination of both. There are also some seeds that can’t be saved because some seed companies engineer their seeds so that their offspring seeds will not grow. That way you have to keep buying more of their seeds. Stick with heirlooms, you won’t regret it.
You’ll need to start some seeds inside according to the area you live in. I start mine in late February so that I can set them out in early April. This week I’m starting all kinds of annual and perennial flowers, onions, and lettuce. I’ll start my tomatoes and peppers and hot weather plants in mid March so they are ready to go by Mother’s Day. Look for seed starter that is organic or at the very least, doesn’t have chemical fertilizer (miracle gro and such) added to the medium. I use mostly organic milled spagnum moss because it’s cheaper than organic soil and easier to handle. If you haven’t saved your small yogurt containers (or asked a friendly neighbor with small children to save them for you), you can buy seed flats or make your own biodegradable newspaper pots (requires a special talent or the use of a wooden tool sold in garden catalogs). If you’re using small yogurt containers, you’ll need to put holes in the bottom of the container to allow for drainage and so you can water from the bottom. I use a tiny drill bit and a cordless drill and make quick work of it.
Grow lights can be set up anywhere. An easy way is to utilize a bookshelf you already have. Clear off the books and suspend grow lights from the underside of each shelf. You’ll want to use a spray bottle that has mist setting (you can recycle any spray bottle as long as it is thoroughly cleaned out) and be gentle when watering your seedlings. Investing in a timer for your grow lights is also a wise move unless you’re more reliable than I am about turning the lights on and off at the correct time each day. Popsicle sticks make fine labels so that you don’t forget what you planted. Your seed packet will tell you how deep to plant each seed and expected germination rate (when you'll actually see something green appear).
When deciding what to plant be sure you plant what you’ll use, not just what looks good. Another rule of thumb I use is if I can find it cheaper and yummier locally, I don’t grow it myself. I always plant broccoli because I love the way it looks in the garden. But it is a space hog for not a very large yield and truth be told – my broccoli isn’t any better than the local broccoli I can buy at my farm stand. So I have vowed not to plant broccoli this year – we shall see!
I can’t do without lettuce, spinach, tomatoes, cucumbers, beans, onions, garlic, peppers, and herbs. If I have space I add corn, watermelon, pumpkin, potatoes, carrots, peas, radishes, zucchini, and just for fun – decorative gourds. You plant what works for you. The planning is the best part – I love dreaming up my summer garden in the dead of winter.