Showing posts with label organic gardening. Show all posts

Friday, July 10, 2015

Full Confession: I am no longer an organic gardener

After this past week I can no longer call myself an organic farmer. Sigh.

The Japanese beetles got me. I’ve put up with squash bugs and voles and those nasty invisible beetles that eat up my beans. And while we’ve had Japanese beetles before, I’ve never reached for the chemical weapons with any of them. I moved plants around, incentified the cats, and picked thousands of beetles off plants to drop them to their certain death in my bucket of dish soap.

But then last year happened. I wrote about it. It was devastating. They killed my peach and my nectarine trees, both of which were loaded with their first real crop. I was heartbroken. We ardently applied the milky spore – spent hundreds on it to be sure we treated all the ground around the gardens and fruit trees. We ordered new fruit trees and chalked the whole experience up to the difficult but noble pursuit of organic gardening.

And then I came home from my camping trip in June to find the Japanese beetles were back by the millions. They were devouring my grapes which had barely survived the onslaught last year. They had lived, but been reduced to the size they were the second year of their lives (they are eight this year). The beetles swarmed my gorgeous plum tree which was loaded with beautiful tiny purple plums for the first time ever. The raspberries and asparagus, even the rhubarb were swarmed by beetles.

What the heck? How did this happen? What about all that milky spore? Seems last year’s beetles must have sent out a message and it went viral and now all their friends and relatives had converged on our little hillside for a mass feast.

Friday, August 8, 2014

Excuses, excuses.....

It’s Friday and I still haven’t written my post for this week. Here’s why…

My tomatoes have been stricken by the blight…..


And then I found this nasty guy (girl) covered in eggs ready to eat what’s left of them.
 So I’m canning as fast as I possibly can.


The Japanese beetles haven’t let up….


Even though the Assasin bugs are out in force. 
(Assasin bugs might look nasty but they are one of your best allies in the war on Japanese beetles.)

The cucumbers are growing prolifically and I’ve finally found a way to make crisp pickles after nearly 20 years of trying! (Hoping to post about that next week!)
This morning I found this Siamese cucumber.


Everything seems to be ready at once in the garden. The potatoes are ready to come out of the ground.


The carrots should have come out a few weeks ago!


And I have more beans than I know what to do with.


So please forgive me for being a slacker blogger. If your garden is anything like mine, you don’t have time to be reading my silly blog anyway! 

Tuesday, July 8, 2014

Under Seige from Japanese Beetles

Japanese beetles are killing me. Well, actually, they’re not killing me, but they are killing many lives that I hold dear. 

The cherry tree that survived the attack of rust two years ago that killed the other cherry trees is covered in skeletalized leaves. The nectarine tree is covered in beetles boring into the fruit and causing them to shrivel and ooze juice. The grapes are putting up a valiant fight, growing new shiney lime green leaves to replace the ones destroyed by the beetles only to lose those new leaves within days. 

Even the asparagus is covered in the nasty creatures. I’ve never seen them go after asparagus before and if they kill mine I just may hang up my shovel and go buy a condominium. What is there to do?

Wednesday, April 9, 2014

Garden Remodel and Mint Invasion

The peas are in the ground! Finally! I don’t know that I’ve ever planted them this late. (the picture of the planted peas was just dirt, so I took a picture of crocuses instead.)  This year’s garden is going to be a haphazard affair, it seems. We’ve got a construction project going which has forced me to relocate my strawberries, another chore I took care of this weekend. They wouldn’t all fit in the temporary bed I prepared for them, so some of them went in pallets. I’ve never tried this, but am hoping it works.

The driveway is being expanded and repaved- a project that has been overdue for at least ten years. New terraces and swales are being cut into our hillside to fix drainage issues. In the end, I’ll have two new huge garden beds! Well, since I’m losing one (the strawberries) in the process, it’s only a net gain of one bed. But as long as I’m still sending the garden to lawn ratio up, that’s all that matters.

This is the garden that's going -(I built that wall myself ten years ago by the way)

I’m a little nervous about one aspect of the garden remodel. In the bed where the strawberries used to reside there is mint. And when I say there is mint, I mean the entire bed is overrun, underrun, completely overtaken by mint. The strawberries have generally been able to hold their own in the battle for control, but the mint has always been on the winning end and I have to ally myself with the strawberries by mid summer and ruthlessly pull out any and all mint I can find. That still leaves plenty by fall when I cut it and dry it to make mint tea. My concern is this – when the old bed is bulldozed and the new beds are terraced into the same hillside, will the mint be EVERYWHERE?

Friday, August 30, 2013

How To Get the Most out of your Fresh Food

I’ve canceled nearly every magazine I subscribed to in the name of sanity. It gets out of control, and really, who has time for that many magazines? It’s not as if my life is overflowing with downtime. Besides, they were piling up in the corner of my kitchen counter and nagging at my conscience. There is no way I could ever read them all, so slowly but surely I’ve stopped re-subscribing. I have to note, though, this does not stop the magazines from continuing to arrive each month with ever more alarming bright paper covers threatening, “THIS IS YOUR LAST ISSUE!” I wish there was someone I could call and say, “Relax, I’m okay with that.”

I still subscribe to a couple that I can’t resist. One of those magazines is Mother Earth News. Mother has
been around since 1970 and has always been ahead of the curve in terms of protecting the environment, sustainable living, and organic food. It’s filled with scientific research, calls to action, and DIY projects for people living in the suburbs of New Jersey to people living off the grid on a hillside in northern Montana. I get a kick out of reading the classifieds in the back too. They appeal to my hippie nature – advertisements for modern day communes, composting toilets, dome homes, and mealworms by the pound. Entertainment value aside, the magazine is chock full of information and directions I trust whether it’s chicken keeping, pressure canning, building your own solar hot water heater, fermenting food, or this month’s feature – how to get more flavor and nutritional value out of your fresh food.

I saw the title and opened to the article, curious to know how you can improve fresh food you’ve already picked. I took it for granted that Mother assumed I was dealing with organic fresh food. The article boasted ten tips. I encourage you to look it up for yourself, but just in case you aren’t a subscriber (what?), I’ll summarize: 

Saturday, July 6, 2013

The Blight Battle Begins

The battle has begun.

The battle to avoid the Tomato Blight of the Summer of 2013.

I did everything I could to avoid it. My babes were raised on homemade seed starter containing lots of organic compost. They grew strong and healthy in our basement under the lights, transitioned to the porch for hardening off and were planted after danger of frost in our best vegetable bed where no tomatoes had been grown in over three years. They were mulched heavily in clean straw and on cold nights were blanketed in buckets.

I dutifully snipped off all the branches that neared the ground. We gave each plant its own cage to protect it from flying feet chasing baseballs and to later support them as they grew.

We watered only when necessary, using a soaker setting and being careful not to splash the leaves.

And yet….

Wednesday, May 29, 2013

Book Club! My thoughts on Organic Manifesto by Maria Rodale


Maria Rodale’s book, Organic Manifesto: How Organic Farming Can Heal Our Planet, Feed the World, and Keep Us Safe, presents a clear blueprint for change. In plain language she explains the dangers of chemical farming, the misconceptions of organic farming, and calls out the government on its irresponsibility towards our health and well-being in favor of corporate influence.

“Farmers are caught on a treadmill” she writes in her compassionate defense of many farmer’s reluctance to return to organic farming. They and their land have become dependent on the chemicals, GMO seeds, and tax breaks generously offered for chemical farming. She offers two scenarios – one of a farmer trapped in a chemically dependent farming system and another that follows an organic model of farming. Painting these two drastically different pictures she calls to task all those who say it can’t be done profitably. She further disputes the tale told by big business that the world would starve without chemical farming.

Wednesday, May 15, 2013

The Secret to My Organic Garden


“Organic gardening is too labor intensive.” So sayeth the generally ignorant population. This is the standard defense line of traditional chemical gardening (crops grown with the use of treated seeds, artificial fertilizers and toxic pesticides and herbicides). But I would beg to differ.

I’m a fundamentally lazy gardener. I try to grow mostly useful plants, and the few flowers I cultivate are nearly all perennials that can take care of themselves. As much as possible, I try to garden organically. I choose heirloom and/or organic seeds and seedlings and save seeds each year. I use no pesticides and depend on the ladybugs, chickens, bats, and cats to keep the pests under control. Our horses, chickens, and compost provide plenty of fertilizer. But what about the weeds?

Thursday, April 25, 2013

The Slacker Blogger Pawns You Off on Someone Else (But wait...good stuff is coming!)


This week I am overwhelmed by my gardens, my children’s activities, and my life, so instead of an actual post, I’m offering links to some other blogs I find interesting.


Lots of great projects/ideas/recipes/inspiration mostly for women at home with kids, but also plenty of good ideas for people with no kids (like this week’s post on how to make your own re-usable produce bags). The pictures are beautiful. I aspire to blog as well as Kelly.

Maria’s Farm Country Kitchen – this blog from Rodale’s queen of organic gardening is inspiring and practical. I get lots of my ideas from this blog. (copying is the sincerest form of flattery!) Organic Gardening offers over a dozen other blogs on various gardening topics.

Kelly Rae is my favorite artist/designer who offers beautiful art, powerful messages, and inspiration like nobody’s business. I just adore this woman and her creations. I'm slowly filling my house with her work. Check her out.

 Enjoy! And have a wonderful weekend. Next month – Book Club and the Wear-Everything-You-Own challenge!

Tuesday, October 16, 2012

One Potato, Two Potato, Sweet Potato, VOLE!

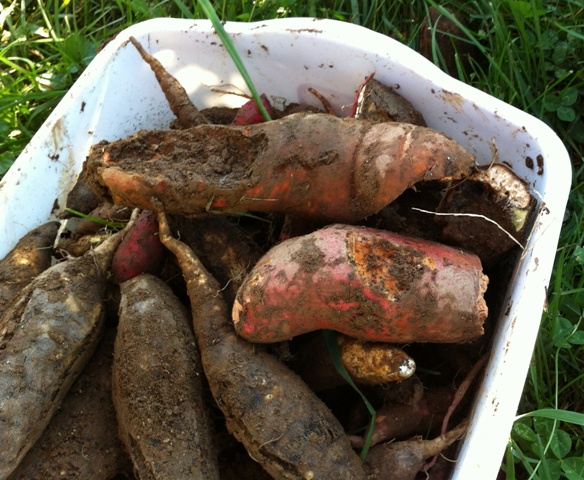
All summer long I raved about my sweet potatoes. I’d put more in this year than ever and they look vibrant and healthy, sprawling over the garden edges in a gorgeous show of green with hints of purple. This past week, I decided to dig a few and make sweet potato fries on the grill. The presence of both cats, sitting like vultures on the border of the garden as I began to dig should have been my first clue that something was amiss. As soon as I began to dig, they began to pace and prowl. The first potato I dug looked gorgeous! From one side. The other side was completely eaten away by some underground thief. After a few more turns of the shovel, the older cat pounced and quickly darted away carrying a limp brownish-gray figure. Voles. Ugh. The rest of the dig went much the same way. Great day for the cats, not such a great day for me. 

I salvaged what I could because sweet potatoes are one of the nutritional powerhouses that I try to pack in to as many meals as I can. They contain beta carotene, vitamin C, iron, potassium, fiber and complex carbohydrates, to name a few of their benefits. My children shrink from their oddly sweet taste, just as I did when I was a child. Vegetables aren’t supposed to taste sweet, or so I thought. It wasn’t until I became an adult that I discovered what a boon they are – yummy, sweet, healthy, and relatively low in calories. I tricked my own children in to eating sweet potato fries by growing white sweet potatoes one year. I sliced them up, tossed them with grapeseed oil and flaked salt, and grilled them to perfection. The kids thought they were especially delicious fries. I clued them in after two or three meals and now they’ll eat sweet potato fries even if they’re orange. 

One of the challenges of growing sweet potatoes for me (besides the new challenge of a resident vole colony), is figuring out how to cure them. They need hot, humid temperatures for a few weeks to cure so that they’ll last through the winter. Heating with wood makes our house relatively warm, but not at all humid. Last year’s sweet potatoes lasted until January. This year I’m trying a new trick, suggested by the sweet potato queen and king who live just around the corner (more about them later). I’ve double wrapped them in newspaper and have them nestled in a warm corner. We’ll see what happens.

The vole-damaged potatoes, I’ll cook up and make in to a mash to freeze. Then I can use them for sweet potato pie, bread, and the favorite in this house – sweet potato pancakes. 

The chickens are currently digging up my sweet potato bed eating grubs and ruining any of the remaining vole tunnels. I’ve yet to decide on a battle plan for next year’s voles, but would welcome your ideas. 

Lucky for me, the Pennsylvania Sweet Potato festival is held just down the road. My daughter is a regular volunteer, working for sweet potato pancakes. I joined her this year and tasted a few of the sweet potato pies (vanilla, chocolate, blueberry). Bev and Jack Osman host the sweet potato festival on their beautiful farm in Stewartstown PA. You can dig your own sweet potatoes or buy them already dug. The sweet potato theme carries through the day with music, crafts, and lots of sweet potato food. I should have written this post a month ago to remind everyone, but be sure to watch for the festival next year.  

Locals can learn about sweet potatoes and many other wellness topics by attending classes led by Bev and Jack this fall at the Wellness Center at the farm this fall.
Stopping by their stand at the farmer’s market this weekend, I picked up a brochure entitled, “Sweet Taters for Your Little Tots” full of ideas to help you raise sweet potato lovers from an early age. I wish I’d tried a few of these tricks when mine were still malleable. Here’s a few of the suggestions: 

  1. You can easily make sweet potato baby food by baking a sweet potato at 450 for 25-30 minutes and then scooping out the potatoes and pureeing them.
  2. Sweet potatoes can be diced in to finger food, microwaved a few minutes and served with a side of yogurt for dipping.
  3. Add sweet potato puree to the cheese sauce in mac n cheese.
  4. And of course, make fries out of them.
Now’s the time to stock up on local sweet potatoes in season to eat all winter long. Just be sure to buy cured sweet potatoes, or cure them yourself in a warm bathroom. 

I’ll be experimenting with adding sweet potato mash to many meals this winter, since I’ve got a freezer full. If I stumble upon any masterpieces, I’ll be sure to let you know.


Wednesday, August 22, 2012

Tomato Wisdom

I don’t know about your house, but it is high tomato season at my house. We are virtually drowning in the sensous rosy red fruit (although some of our heirloom varieties are pink, yellow, orange, and my favorite – rainbow). So far, I've canned 27 pints of salsa, 24 quarts of tomato sauce, 18 pints of diced tomatoes, and 16 pints of pizza sauce. And still the tomatoes ripen. There’s no time to write while the sun is shining, so here’s five little nuggets of wisdom I’ve gleaned from the tomatoes this year:
 
  1. You don’t have to do things the way everyone else does it. You don’t have to peel the tomatoes. If you’re making puree or pizza sauce, or even tomato sauce, just clean them super well, core and seed them, and run them through the food processor until they are liquefied. Skipping all that peeling saves endless time.
  2. You don’t have to stick to your plan. Use up the most ripe tomatoes first. Let go of your best laid plans and use up the over-ripe mortgage lifters first if the Amish paste tomatoes are still firm. Once a couple tomatoes start to rot in your containers, the fruit flies and ungodly stench descend. Get to work.
  3. Sometimes it’s best to put off until tomorrow what you really can’t do today.  If you don’t have time and you are overrun with tomatoes, clean them really well and put them in plastic bags in your freezer. If they're destined to be sauce anyway, freezing them won’t hurt –promise. You can can at Christmas if you want. Or use them as you need them, provided you have the space to store them in the freezer. Our cow arrived a few weeks ago, so all the space in our freezer is spoken for.
  4. Cheating is permitted when there’s nothing at stake except your sanity. You can stretch out your work time by refrigerating your tomatoes. We’ve had them wait two weeks on us with very little loss by picking and putting them directly in the fridge.
  5. Even when you’re busy, it’s important to feed your children well. Plant cherry tomatoes and when your kids are hungry for a snack, send them to eat directly off the plant – saves time, dishes, and money!
Using the deep fryer base to can outside. Water heats faster and it keeps the heat out of the kitchen.

Tuesday, April 17, 2012

My Black Thumb

Just to be sure you aren't under the illusion that my thumb is greener than the next person, I’d like to confess the gardening disasters that have already befallen me (or it might be more appropriate to say the gardening disasters I have already created) this spring. This growing season is shaping up to be my worst ever, unless you include the year I had a sick newborn and planted only potatoes because they would require nothing of me.

The first disaster started back in the fall in our brand new terrace garden. We filled the hillside bed with dirt harvested from our paddock – rich with ten years worth of natural fertilizer.

And then I planted a cover crop of rye grass. The plan (as I understood it from skimming an Organic Gardening article), was that the grass would run its course and die out by spring and then we would knock it down to serve as a natural mulch for our tomatoes. Brilliant! No more purchased mulch, plastic or otherwise, since the last two seasons we’ve gotten the early blight and the late blight. This was to be the year of the tomatoes!

 The grass grew beautifully all winter. The problem is that the northeast has experienced the warmest winter on record (at least my records) and that grass is still growing and growing and is so thick and tall that the kids hide in it for Capture the Flag. Now what? So much for my grand plan.

There is a second part to the tomato disaster. This year I made my own growing medium. I blogged about the beautiful mix I concocted. I started eight different varieties of tomatoes, plus four sweet peppers and four hot peppers in the growing mix.

Wow! The germination rate was through the roof! My growing mix was amazing – every single seed I planted sprouted, plus some appeared to have duplicated themselves because some of the pots had 8 seedlings fighting for light. I patted myself on the back and thinned my seedlings.

A few days later, I noticed there were even more seeds sprouting. The problem was, every single seed that was sprouting was a tomato. Even the peppers. Tomato seedlings have hairy stems – you can’t mistake them for anything but a tomato. How was it all my seeds were tomatoes?

When I checked the buckets of growing mix, yet to be used, there were hundreds of tomatoes sprouting there too. Obviously my compost was full of tomato seeds, and God knows what kind of tomatoes at that. Were they seeds from the organic cherry tomatoes I buy for my oldest to snack on all winter? Were they seeds from the first tomatoes we harvested last year, before we knew we had the blight and happily threw discarded tomato pulp in the compost? Or were they seeds that I had just planted? No way to know.

So here I am with plenty of tomato seedlings, only I’m terrified to plant them for fear of the blight, plus I have no earthly idea what kind of tomatoes they are.

And the disasters just keep coming…..

Since we were having trouble containing the chickens, I decided to sprout my peas before planting them. That bought us a few extra days to secure the chicken fence and clip every wing. The peas were slow to sprout and the day they were ready, I was leaving town for my little brother’s retirement celebration (I’m not that old! He’s an air force pilot who retired after 22 years).

With no time to plant, I thought I would stall them; I put them in the fridge to wait until I got back three days later. I did wonder if this might kill them, but I figured they were peas and the temperature wasn’t freezing so they would survive.

Wrong. Those lovely sprouted peas I planted promptly when I returned produced only 3 viable plants (out of probably 100 seeds). So today I replanted my snap and snow peas and berated myself the entire time.

And the fun continues…
Meanwhile, the lettuce I planted several weeks ago was still not appearing, same for the carrots, spinach, and onions. I figured this was mostly due to my negligent watering habits, but could also be blamed on the fact that the only rain we had in the past two weeks was a huge downpour the day after I planted all those tiny fragile seeds. For a week, I watered diligently. No dice, just a couple onion tips.

Perhaps they washed away. Perhaps they did. When I dug around to add more seeds, I found only a handful of lettuce plants getting started. Ugh. Replanted the lettuce and spinach this morning. The carrots are on their own. I never have good luck with them anyway and I’m going to assume the onion bulbs will get going once the gardener gets her act together and starts watering on a regular basis.

This would all be very depressing, except the great thing about gardening is that seeds are cheap. You can always try again tomorrow. In digging up the OG article that led me to plant the grass, I discovered that you can just knock down or mow the rye grass. I tried tromping it down, but it just bounced right back. I’m thinking we might have to use a scythe, that’ll be fun, won’t it honey?

And the tomatoes. I pulled out everything from eight of the starter pots and put fresh seeds in them, figuring all the volunteers who were going to volunteer had already done so. I’ll use my eight new plants as templates to decipher what is growing in all the other pots.

This is the goal. Someday.
I hope your gardening season is off to a better start than mine. I’ll let you know how the story ends.

NOTE: I'LL BE PRESENTING A WORKSHOP ENTITLED "CLEAN AND GREEN LIVING" AT THE MASON DIXON LIBRARY WEDNESDAY APRIL 18 AT 6:30 PM. WOULD LOVE TO SEE YOU THERE.

Thursday, March 22, 2012

Get It Started!

I’m late getting my seeds started this year. The basic problem is I’m thinking too much. This is a common problem for me. Too much thinking/dwelling/considering and not enough doing.

Initially, I was so ready to get going with the garden that at the first sign of spring (75 degree weather in the middle of February!), I went out in search of soil. The problem is that my local gardening place wasn’t open yet for the season and the only thing Home Depot had was “Organic Choice” by Scott’s Miracle Gro. In my zest, I bought it, carted it home, and left it on my porch. Where it still sits because a) I became extremely skeptical that anything made by the Miracle Gro people could possibly be organic and b) even if it is, the Scott’s company is responsible for law suits against organic competitors, not to mention the poisoning of more lawns and gardens in America than anyone else.

Everyday as I walked past the big yellow bag, I felt guiltier and guiltier. This past week I realized that I’d spent so much time wallowing in my guilt and indecision that it’s less than 8 weeks away from Tomato planting time and I have yet to start a single seed. So I went to my computer and googled “Organic Choice by Scott’s” and low and behold it is actually certified by OMRI (Organic Material Research Institute). OMRI is the non-profit organization responsible for certifying gardening materials for certified organic growers. They keep a database on all the products they certify.

The skeptic in me wonders how a non-profit agency that is funded by donations, grants, and the fees it charges for the certification process could possibly keep tabs on the tens of thousands of products out there, but the trusting soul in me figures there’s really no other option but to go with it. Still. Scott’s is a pretty lousy company. If their product is so superior why is it they have to wage legal and financial war on small organic companies to eliminate the competition? I haven’t opened the bag.

My usual practice is to mix sphagnum peat moss and vermiculite with potting soil to start my seeds, but now that my potting soil is giving me such mental fits, I decided to try something different.

Seed starter is exactly what it says it is – a medium for starting seeds. Typically, it has very little nutrients in it because seeds don’t need nutrients to germinate. Once they have their first true leaves, however, they need some food. So that’s when it’s recommended that you transplant them to potting soil. I’m a lazy gardener in a hurry, so I combine the seed starter and the soil to begin with and skip the whole transplanting step, except for my tomatoes, the royalty of the garden. I do transplant my tomatoes to bigger pots somewhere along the line.

I searched OMRI for commercial seed starting mixtures that are certified, and found only one brand which isn’t available at my gardening store. I turned to OrganicGardening Magazine’s website (highly recommend this site to anyone with gardening questions or anyone just starting out gardening – super helpful articles). They recommended a home-made seed starter recipe of screened compost, vermiculite, perlite, and sphagnum peat moss. Their potting soil recipe was simply compost and vermiculite. I decided to split the difference and create something that has all four ingredients, but is heavy on the vermiculite and compost. We shall see.

In the interest of my own completely non-scientific research, I’m also going to mix vermiculite, compost and my own garden soil for some of the seeds.

It’s also time to start the peas. Because my hens are not completely finished tilling the garden for me, I decided to try germinating the peas myself in wet paper towels. This will give the girls a couple extra days, but keep my peas on schedule. I’ve never tried this, but have heard from old-timers that it works great.

Stay tuned for the Seedling Update and the Pea Report next month!

Have you started any plants yourself? The ground is warm enough for lettuce, spinach, and carrots, so scatter a few seeds. It’s also safe to put in your broccoli plants and cabbages. You don’t need a designated vegetable garden, just find an open piece of soil in one of your flower beds and have at it. No excuses for no garden. Plant something!

Thursday, October 28, 2010

Lasagna Time!

Do you ever say to yourself, “If I had all the money in the world, I’d hire a landscaper to come turn that part of my lawn in to a real garden?” OK, maybe you don’t. But if you didn’t have to dig up all that grass and till the heck out of it, wouldn’t you like more garden space? If for no any other reason than it’s less grass to mow? Organic fruits and vegetables are expensive – new gardens are not. A little work now can open up your options this spring.

Last weekend, my husband and I were on our way to visit vineyards in Virginia. I was boring him to death by reading about the vineyards aloud until he gently told me he’d rather I didn’t. So I kept the next gem to myself. He, being the chief grass cutter and weed whacker on our estate, would have appreciated the Italian vineyards philosophy on the grounds surrounding your home.

The literature stated the vineyard was designed in keeping with the Italian tradition of everyone having their own groves, vineyards, and gardens at home utilizing all available outdoor space (OK, maybe they left room for a Bocce Ball court). They thought a “lawn” was a waste of natural resources (I’d have to agree). My husband came home from our visit cautiously considering putting in our own vines, and I arrived motivated to begin reclaiming our lawn for more productive purposes.

So first thing Monday morning I made a lasagna garden. I know I’ve written about lasagna gardens before, but just in case it didn’t have the life-changing impact it should have had, I’m going to refresh your memory.
A lasagna garden begins with any patch of ground. This ground can be an old garden, an underachieving garden, or an absolutely unadulterated lawn. I’m generally in favor of staking your claim on the useless lawn, but that’s just me.

After envisioning the size and shape of your garden, cover the desired area with a thick layer of newspaper. Yep, newspaper. Be sure to leave out the shiny colored circulars. It’s best if the newspaper you choose uses vegetable inks (the York Daily Record does). Try to choose a day when the wind is not whipping around. After you lay out the newspaper, wet it thoroughly and then begin your lasagna.

Lasagna consists of layers of “green” (compost, manure, grass clippings, basically anything rotting) and “brown” (leaves, straw, peat moss, mulch, pine needles, wood ash). Continue adding layers at your whim for a month or two and then leave the whole thing to “cook” over the winter. If it’s a dry fall, you may want to wet it occasionally to move the process along.

It may not look too pretty (until the first snow hides it), but by spring you’ll have rich wonderful soil, ready to garden. And you didn't have to lift a spade because you turned your lovely lawn in to compost for your new garden! If you want more detailed, technical directions, I highly recommend the book Lasagna Gardening by Patricia Lanza. (buy it through the link below and you’ll make me 2 or 3 cents)

In my new lasagna garden this spring, I’ll add more blueberry bushes adjacent to our current blueberries – less hillside to mow and more blueberries to share with the birds (this year we’re going to buy a net….). I’m not finished adding lasagna gardens though, I’d love for this place to look like an Italian homestead.

I’m getting ready to harvest my fall peas and dig up the peanuts before setting the chickens loose to free range for the fall/winter (aerate the gardens and eat the pests – hopefully lots of stink bugs!). Maybe you’re getting ready to close up your gardens too, but before you do – don’t forget to start next year’s. October is time to plant your garlic, shallots, and spring onions. It’s also time to dream a little dream of all the wonders you can grow next year and get started on the lasagna.

Tuesday, June 1, 2010

How Do You Do It All??

A friend visited recently and wanted to see all my gardens. As we walked from bed to bed, she kept remarking, “I don’t know how you have time to do all this!” As I tried to explain to her, I don’t. There is rarely a day when I can throw together consecutive hours to work in my garden. I do it in minutes stolen here and there. Some weekends I am blessed with an afternoon, but those are very rare with three kids heavily involved in life and sports.

Here’s my secret. And no, this isn’t where I confess that I have a staff like Martha’s that swoops in with mulch and compost and designer plants. I wish. That’s right up there with Esmeralda the maid I wish I had. Last night after two children and one husband had literally run from the dinner table to make it to a baseball game, I was left staring at the ruins of dinner. My remaining child looked at me and shrugged his shoulders and then got up to leave too.
I sighed and said, “This is when I wish Esmeralda would come in and clean up.”
My son paused, having heard this before, and asked, “Mom, was there every really an Esmeralda?”
I told him, “Not really, but if there was, she would clear these dishes and then come back and wipe the table and pick up the black beans that your brother spilled on his chair, and after that she would do the dishes and even change the laundry that’s been sitting in the washer all day.”
He watched me carefully, perhaps wondering if I was in to the dope that has been reportedly flowing freely through the middle school, and said, “That’s too bad,” before leaving me with the mess.

My secret with all the gardens is to steal minutes. When I have yelled and yelled that it is time to leave for practice and no obedient children have come running, but several less-obedient children finally realize they don’t know where the other cleat is and there are no clean water bottles, I grab my favorite weeding tool and work on the strawberry patch while they locate the errant cleat and wash the water bottles.

When I get back from the school and realize I have 20 whole minutes before I need to start dinner, I grab my seed packets and markers and plant whatever needs planting.

In the morning after I feed the horses, when I’m not sure I want to wade back in to the fray of before school preparations, I’ll pick up a few thyme plants that are waiting to be transplanted from their pots to the garden and tuck them in.

When I’m on the phone with my dear friend in Idaho who I could talk to for hours, I balance the phone on my shoulder and use my stirrup hoe to clean up the areas between the rows.

The reason I can garden like this is- I leave my stuff out. I know that dad’s everywhere will cringe at this directive, but it works. I leave my stirrup hoe leaning against the pea fence in the vegetable garden. That way it’s where I need it whenever I have a free minute to weed. I do realize that garden tools last longer if you don’t leave them out in the weather. I’m sure that’s true. My garden hoe is over 10 years old and still works like a charm, so I’m willing to challenge the “put-the-tools-back-where-they-belong” commandment.

I also leave out my garden bin. It sits on the porch near the door where I can grab what I need at a moment’s notice. No, it doesn’t look so great with plant markers and empty yogurt container seed pots spilling out of it, but I’m not about that. Again, I’m willing to challenge the “the-porch-should-be-spotless-and-beautiful-at-all-times-just-in-case-someone-important-comes-to-visit” commandment. All the important people in my life garden or love what comes out of gardens and they’ll understand.

In my garden bin I keep:
• Seeds to be planted
• Plant markers
• Permanent markers to write on plant markers
• Small shovel
• Weeding tool
• Plants ready to go outside (if they are large I just put them where they will reside in the garden in their pots so they are ready to go when I am)
• The Seed catalog (so I can refer to it, if I have a question about planting or harvesting)
• Gloves (2 pair because one always seems to be wet)

Near every garden you will also notice a weed bucket left out. A weed bucket in our world is a manure bucket with holes drilled around the bottom rim (or cracks created when they are handled less than carefully when the weather was freezing). The holes and cracks are necessary because these beauties sit out in all kinds of weather and a bucket filled with weeds and water is not only ungodly heavy, it stinks to high heaven. I know the buckets are not so attractive, but once the veggies get going, you don’t really notice them.

This last thing is my real secret – the list. I keep a list on my kitchen counter of the current needs of my gardens. That way I don’t experience that deer-in-the-headlights feeling that can overpower me when I suddenly realize I have 10 minutes all to myself. If I don’t know what needs done, I scan the list and pick something. Right now the list says:

“Pick swiss chard and blanche, plant pumpkins somewhere, find sticks for bean teepee, weed the peas and corn, put the rest of the mulch somewhere, snip the bottom branches off the tomatoes, check the garlic & shallots.”

It’ll only take a few minutes to plant the pumpkins (after I figure out where I have room), and weeding the peas and corn can be done in spurts, so those are great 10 minute chores. The tomatoes are an “every time I walk by” chore. You have to be vigilant about the bottom leaves touching the ground this time of year (the blight is always lurking!). It’ll take longer to locate the right size branches to build the bean teepee, so that might require 20 minutes, and checking to see if the garlic and shallots are ready will take 2 minutes. I’ll need 25 minutes or more to pick the swiss chard and clean it and blanche it for freezing. I might need even more time to start the pick-up and clean out the remaining mulch from its bed (the bulk of this time being the starting the pick-up part). All these things will get done in between the rest of my life this week.

This is how I garden – a minute here and a minute there. If I waited for the hours, it would never happen. There are tradeoffs of course, the inside of my house doesn’t look so good, but that doesn’t matter so much since this time of year we’re all outside anyway.

Thursday, May 13, 2010

Are GMOs the Answer?

Demand Organic. That’s the latest campaign of the Rodale Institute, founded in 1947 by organic pioneer J.I. Rodale. If you look around your book shelf you may find you have a Rodale book or two – they are prolific in their promotion of organic gardening and healthy living. Or maybe you’ve read Organic Gardening, the best magazine out there for those of us trying grow things the way nature intended if nature intended to be corralled in a garden.

My oldest son recently wrote a paper in defense of GMO farming practices. I, of course, was pretty horrified. But after talking about it, he admitted he was only going on the stuff he’d read in class. I offered more information and he told me that was interesting but the paper was due tomorrow. Hmm. When I read his paper he made some very valid points about how difficult it is to feed the world’s growing population. He felt that genetically modified foods were the only solution. They aren’t. In fact, besides being potentially hazardous to our health (there are no long term studies to prove otherwise), they increase our dependency on individual companies and set us up for world-wide famine in the case of a crop failure.

If, for instance, we convince 100 farmers in a desperate region in Africa to plant a particular gem of a GM seed and then that seed turns out to be a health hazard, what then? Or, if those farmers plant that GM seed and are then obligated to use the same company’s pesticides and fertilizers to protect the seed and stimulate its growth, they strip the land of what little nutrients were present in their soil to begin with and create a dependent relationship with that seed company. Farmers can’t save the patented seeds produced by the crop they grow, and even if they did they are dependent on buying even more fertilizers and pesticides to make their soil capable of growing anything. Sure those seeds produce a massive harvest, but over time all those chemicals create some awfully screwed up, sterile soil. It may be a short term fix, but it won’t last over the long haul. Plus all those fertilizers and pesticides run off in to the water supply or are carried off in the air supply and they will slowly poison not just the planet, but us. That’s just one scenario. I’m certain I’m only scratching the surface of the potential dangers of depending on GMO food to solve the hunger crisis.

The Rodale Institute has been carrying out the longest-running US Study comparing organic and conventional farming techniques and has helped to train soil building farmers all over the world. Their methods work and they won’t kill us in their effort to feed us. I trip over my own words too much in my efforts to explain all this and I don’t completely understand all the methods of organic farming, so I’d love it if you would check out Rodale’s website www.demandorganic.org so you can get a first rate explanation. I don’t have the answers; I’m just trying to raise awareness. Rodale has done the work and they’ve been doing organic since way before all of us wannabes got started, so they are your best source.

Besides learning about how organic farming methods can teach the world to feed themselves, you can learn lots about how to grow your own organic food and demand organic products in your own community.

Here are five things you can do to help promote organics:
1. Buy organic and local whenever possible.
2. Give an organic gift.
3. Don’t buy GMO food.
4. Ask your local markets to carry more organics.
5. Speak up to your friends (and your family) and explain why you prefer organic and local products.
6. Learn more so you can speak intelligently. Visit www.demandorganic.org.

OK, that was six things. I always have too much to say. Here’s my last request – Don’t accept the status quo. My son’s textbook and classroom teacher told him that GMO food is the answer to our future food crisis. But it’s not the only answer. When people say, organics are fine for rich people, but they will never work for the general population, call them on this because it’s bullcrap (sorry, it just makes me angry). Our ancestors survived and thrived on organic farming methods. It wasn’t until someone showed up with a Star-Belly On machine that we Sneetches decided we needed to change the way we were growing food. Just because something is new and glossy doesn’t make it better. Doing the hard work of caring for our land, rather than just spraying something on it, may make us tired, but haven’t we learned by now that the easy way is not always the best way?

Tuesday, April 6, 2010

Ready, Set, Garden!

I started the garden this weekend. What a great feeling. I planted eight rows of lettuce (which is crazy I know so make plans to stop by for salad in June), a row of hot purple radishes, 2 rows of spinach, 2 rows of carrots, one super long row of sugar snap peas, and one row of swiss chard (which I’ve never planted before and hardly ever eaten, but the picture in the catalog was too much to resist and swiss chard is supposed to be good for you so I’m going to learn to eat it.). The onion and broccoli plants have a few more days to adapt to real sunlight before they will be installed, but they’re moving in this week.

I haven’t been able to clip the wings on one of our roosters and yesterday I caught him in the garden digging up and eating the seeds I’d just planted! Hugely righteous anger. The kids got water cannons for Easter from their grandparents so I appropriated one to keep on the porch so that I can shoot the rooster whenever he makes his way to the garden (which is twice so far this morning). I’m not sure you can train a chicken, but I’m certainly going to try. All the chickens have been sentenced to living in the chicken pen once again since the garden has begun. It’s a tough adjustment after 7 months of free range life. Some are able to fly over the fence (yes, chickens really can fly- but only about 5-6 feet up and they do much better if there is a hill to give them a running start and a gravitational advantage.) To remedy this problem, we clip their wings which doesn’t hurt and isn’t even visible (their “flying feathers” are hidden behind their “standing around looking like a chicken feathers”). Only problem is none of us can seem to catch the big rooster. It doesn’t help that his spurs are huge and he just looks mean. He’s never hurt anyone and he has the wimpiest crow around, but still. I’m going to try to do it tonight when he’s sleeping.

How do you know when to start your garden? The weather’s been beautiful and it’s very tempting to start tucking in all your seeds. For sure there is still cold weather to come so I wouldn’t chance a tomato or a pepper yet and the soils not warm enough for cucumbers or squash. Seeds need the soil to be about 55 degrees to germinate, some need it warmer. Lettuce and peas like it cold. Tradition says you should plant your peas on St Patrick’s Day, but we were still under snow cover on St. Patty’s day this year.

Another good way to know when you can start planting is the texture of your soil. You want your soil to be like chocolate cake not chocolate fudge. So that’s basically it – chocolate cake that is about 55 degrees and you’re good to go with lettuce, carrots, radish, peas (all kinds), spinach, broccoli, onions and any other seed whose packet lists “as soon as the soil can be worked” or “early spring” as the planting time.

If we get a forecast for a serious frost and freezing temps overnight, I sometimes cover my rows with plastic. But sometimes I forget and they do just fine. Here’s a few other tips for planting that I’ve learned the hard way.

The distances between plants suggested on the seed packets are for real. Sometimes I read them and think they’re being overly cautious. I always live to regret this and end up stepping on plants as I try to weed and performing acrobatic feats just to water the veggies.

Mulch or cultivate the soil between rows on a regular basis. This is how you keep weeds from getting ahead of you. A great tool for keeping the weeds in check is a stirrup hoe (looks like a stirrup on the end of a stick). There is no shame in mulch. If you can save leaves in a pile each fall to use for this task you’ll save money. Straw works OK too, but things creep in. Newspapers are good if you can get them weighted down with water and maybe some stones until they start to disintegrate. (Check to be sure your paper uses vegetable based inks. For you locals – the York Daily Record does use vegetable based ink.)

Don’t plant too deep. I’ve committed this crime many times. It usually happens when I’m planting a lot of seeds in a hurry and use a hoe to fill the row back in. The general rule of thumb is to cover the seed with soil as deep as the seed is big. Most seeds are pretty small. You don’t need much soil over them. The best way to do this is by hand and carefully, patting down the earth over the seed as you go. If you plant too deep you’ll wait much longer to see any action and some seeds won’t make it at all.

Put up big signs. You think you will remember where your rows are. You think you will be able to see the little popsicle stick markers. You assume that digging the seed packet in to the soil at the end of the row will help you remember what’s planted there. Here’s what I know – my memory is fading (I don’t know how old you are, but odds are you are no longer a teenager, so yours is on the downward slope too). Popsicle sticks quickly become camouflaged by the dirt, upended by the trampling feet of children and pets, or blown away when the soil begins to dry. Seed packets disintegrate almost overnight and the wind tends to blow them away. You need big signs – I use scrap wood and paint stirrers (free at the hardware store!) and use paint pens to label them. My daughter and I like to write inspiring things on the backs of these signs too. (See my post April 15, 2009 “Planting Seeds and Inspiration”). If you don’t label your rows well, you may mistake newly sprouted lettuce for a weed (lettuce basically is a weed so this is understandable).

Stay on top of the weeds. Don’t wait for them to overwhelm you. Pull a few EVERYDAY and it won’t seem too bad. If you enlist your children’s help (and you should), supervise their weeding or you may lose more than the weeds. Personally, I haven’t had a whole lot of luck putting the kids to work. They are happy to pick, but weed only under duress for large sums of money. Wish I could tell you different, but I have to be honest.

Plan your walkways as carefully as you plan your planted rows. You need to have somewhere to walk – remember that tomatoes get very bushy and pushy, cucumbers and squash can sprawl all over, and carrots and onions will keep nicely to themselves (but don’t handle being stepped on very well). I’m hoping to make some homemade stepping stones this year with the kids using small pizza boxes and a bag of cement. We don’t order out pizzas, so we’d love some donations from those of you who do (hint, hint).

Put up posts on all the corners of your garden to keep the hose from being dragged over your plants. After all that hard work and diligent weeding, it would be a shame if a hose snapped your almost ripe red pepper plant in two. This is a MUST do. We put four foot tall metal fence posts on the corners (shorter stakes tend to do more damage to my shins).

I’m sure there is more to say, but I’m watching a rooster making his way towards my pea row, so I’ve got to fill my water cannon. Happy gardening!

Wednesday, June 17, 2009

Of Weeds, Lettuce, and Tomatoes


OK this is going to be a boring garden post. So if you’re tired of me writing about gardening, you can skip this one. I checked though and I haven’t written about gardening in nearly two weeks! Gardens require maintenance, sad but true. There was a time when I just planted seeds and left them to their own devices. I figured whatever I got was better than nothing. But now I know better. A minimal effort can bring great rewards.

Take weeding. I hate it most days, but I’ve come to find a sense of satisfaction in a weed-free tidy garden, or at least patches of weed-free tidy garden. My garden keeps getting bigger and it becomes impossible to keep all the weeds out. You do what you can.

Mulch is one tool in the battle of the weeds. You can lay newspaper around your established plants and hose it real good for an inexpensive, if unsightly, mulch. If you’re rich, you can just buy mulch and surround your plants. Be careful though, I would caution you that most mulch is not the least bit organic and could leach any number of chemicals in to your soil. I save the commercial mulch for flowers. I don’t worry if they aren’t so organic. Straw is another good choice for mulch, and it will compost in to your garden during the fall and winter.

Mulch aside, it comes back to weeding. I prioritize my weeding efforts. I weed closest to established plants by hand, careful to get the entire weed. Between the roes, I use a stirrup hoe (looks like a real stirrup with sharp edges that you work back and forth over the soil) to just scrape off the top layer beating back the weeds in mass and keeping the weeds from going to seed and expanding my problem. It doesn’t always look pretty but it keeps things under control. Most importantly, weed after a good rain. There’s no point in weeding when the ground is dry as bone, unless you use a hose and hose the area you are weeding, which seems a little backward to be watering your weeds.

Weed every chance you get. Don’t leave all your weeding for one day – can’t be done – or it can and your back will complain about it later. You’re outside admiring how beautifully your tomatoes are taking to their training, you pull a few weeds. You’re killing time waiting for your kids to be ready to go to soccer, you pull a few weeds. Your kids are driving you to drink, instead go outside and pull a few weeds. Every chance you get – pull a few weeds. Sorry, but it’s a never ending process. I've considered using my children as indentured servants to take care of my weeding problem, but I don't want them to resent the garden or anything that comes out of it. Some children can be convinced to help by cold hard cash. Good luck with that.

How is your lettuce growing? As painful as it may be, it’s important to thin your lettuce. You need to pull baby plants that are crowded. You’ll want to keep thinning (and eating the babies you pull) until your plants aren’t touching. This necessitates that you thin as they grow. If you’re lettuce stays cramped and crowded the leaves on the bottom won’t get sunlight and they’ll rot, rotting all the leaves around them too.

If you eat lettuce like I do, you’ll soon have bare patches in your lettuce rows – plant more lettuce. In fact, plant lettuce in any spare spot you have. They love to grow in the filtered sunlight under other plants. Tuck in more lettuce in any spare space you have, and that includes flower beds. Walk around in the early afternoon and figure out if there are places in your gardens that only get morning sun – perfect spot for some more lettuce (or spinach).

Once you’ve picked your lettuce, washing it can take time. Know this going in. When you buy store bought lettuce it has been washed by some high pressure lettuce washing gadget and still you have to wash it because there are little specks of dirt. The lettuce you pull out of your beautiful garden will be covered in dirt, grass clippings, and bugs. The lettuce you bought at the store was once covered in those things too, plus some chemical fertilizers. When you are washing your home grown lettuce, take care to wash it one leaf at a time. Nothing can put you off homegrown lettuce like a bite of slug with your salad. I soak all of my lettuce in my sink as I’m washing it so the bugs will detach themselves or drown. I pick up one leaf at a time for a gentle hand scrubbing before placing it in the salad spinner. Once all my lettuce is clean and dry, I place a dry paper towel in the bottom of a plastic bag and load in the lettuce on top. The paper towel will soak up any water and keep my lettuce from rotting. I keep these bags in the crisper drawer of my fridge and the lettuce will stay fresh for nearly a week.

On to tomatoes – hopefully yours are looking happy and bushy by now. It’s time to give them a trim. Grab your hand clippers or kitchen shears and carefully trim off any of the lower branches whose leave are touching the ground. Then as your plant grows and you begin tying it up to your tomato fence or stake or basket, gather the leaves that are in danger of drooping to the ground and wrap your tie around them as you tie to keep them off the ground. This may sound confusing, that’s why I added the picture up top. The bottom line is you don’t want any leaves touching the ground. If they droop on the ground they can rot and spread that rot to your entire plant. That’s why you sometimes see tomato plants that are bushy and green on top and brown and scraggly on the bottom. They may survive, but they won’t product nearly the same number of fruits.

When watering tomatoes, do all you can to water the ground under them and not the leaves themselves. A good deep watering at their base is much better for them than a sprinkle from your automatic sprinkler. It takes time, but everything that matters takes time. You should know that by now.

Tomatoes need support, like all of us. You can buy tomato cages at the store that do a great job of supporting your tomatoes. The problem I’ve had with them in the past is that it’s impossible to pick the tomatoes that grow inside the baskets. You’re stuck like the monkey in that experiment – you can’t get your hand back out of the cage unless you drop the tomato. Maybe you’ve had success with these cages, but not me. There are lots of other options – fences, stakes, trellis, use what works for you. We’ve used fences in the past, but after last years six foot high tomatoes, this year my husband has made it his personal quest to accommodate the tomatoes no matter how tall they get. He borrowed his system from the tomato gardens he sees in China where he travels for his work. Using skinny boards, he has built a wooden frame that is six feet high with boards going across it at one foot intervals. As the plants grow he uses torn pieces of cotton clothing or sheets to tie the plants. This is a great way to recycle your old t-shirts. He plans to train the tomatoes to snake in and out of the cross boards as they grow up so that the weight will be evenly distributed and the fruits will grow on both sides of the frame. I’ll post a picture on my blog so you can see the tomatoes’ progress. I’ll let you know how this plan works out.

Peas of all shapes and sizes should be ready about now. Remember to pick early and often if you want to prolong your season. It’s just about cherry season too, so watch your local farms for pick your own local cherries.

Monday, February 23, 2009

It's that time again!

This weekend we clipped the chickens’ wings. And as much as I am fundamentally opposed to clipping anyone’s wings, it was necessary because it is time to start the gardens! (If you’ve never kept chickens, you may not realize that 16 chickens can destroy, uproot, and scatter a good size garden in a matter of minutes. They are ruthless in their search for edible bugs) Now that their wings are clipped we can close the gate and they won’t fly over the fence of their pen. So many common phrases have come to life for us as we care for our chickens. They don’t like being “penned up” any more than the rest of us, but they’ll adjust. Just so long as they don’t fly the coop. The great thing about chickens is that they are incredibly forgetful (this seems like a kinder word than stupid) and in only a few days they’ll forget that they used to roam free on our range.

Anyone attempting an organic life needs a garden, even if it’s just a pot on your porch. If you own a home or have access to some open space – cultivate a garden. Nothing will save you more money or make you happier (except maybe free maid service). If your home is limited – be creative. You can build a raised bed on your deck or attach window boxes to the railing. There are lots of wonderful books on growing vertically. You’d be surprised what you can grow with very little space. Potatoes will grow in a garbage can and tomatoes can grow in hanging pots. Herbs will grow in a sunny window.

Do you have any friends who have the space but haven’t put in a garden? Maybe they are intimidated and worried about having the time to care for it. Together you could grow some wonderful stuff. You won’t just share the work – you’ll share the rewards!

If there is absolutely no way you can have a garden at home, or even if you do, consider joining a CSA (Community Supported Agriculture). You’ll meet lots of great people who will share their wisdom with you and you’ll get a larger variety of plants than you could ever grow on your own. Some CSAs operate year round and have dairy and meats, in addition to vegetables and fruit. Check out www.localharvest.org/csa to find a CSA near you.

If you have a suitable space of lawn that you would like to make in to a garden, there’s a fairly easy way to do it. “Lasagna gardening” is a bit of an art form, but you need only to know the basics to end up with a lush garden next season. First you lay out your garden by placing thick layers of newspapers (no glossies and try to avoid too much color) in the shape you have planned. Water the newspaper until it is thoroughly drenched. Now you begin your layers using whatever you have available trying to alternate between “green” (compost, manure, organic liquid fertilizer) and “brown” (dried leaves, peat moss, ashes, grass clippings). You can put on as many layers as you like, adding in more newspaper layers. We have gotten lazier and lazier with this each year. Now we mostly use newspaper, horse manure, dried leaves, and wood ash. No matter how much effort we put in, the garden always ends up being a pretty great producer. Like I said, there are books about this if you’re interested (great primer called simply Lasagna Gardening). The high-tech gardeners amongst you may want to test your soil and add what you need to perfect your ph. I’m a pretty low maintenance gardener and I just trust the earth to do its thing each year.

It’s not too late to establish a lasagna garden for this year. You’ll just have to make your top layer mostly soil. Around here where rocks grow abundantly, it is easier to garden in a raised bed. If that all seems too intimidating, you can always purchase window boxes or pots. You can also build your own boxes with untreated lumber. The bottom of your box should be a sturdy screen to allow for drainage.

So look around you – where could you add a garden? The possibilities are endless – be creative! It’s hard to believe that in just a month things will be green and growing. But they will – it’s time to get ready. Tomorrow I’ll post about seeds and starting your garden inside.