Wednesday, December 26, 2012

2012 Wrap Up

It's been nearly four years since I started this blog. I find it amazing that I haven't run out of things to say (my husband would probably find it surprising if I did). More than anything else, I have strived to keep this blog useful and inspiring, and hopefully even entertaining. I have some new things planned for the blog in the coming year. In addition to an effort to add more hands-on projects, practical parenting solutions and recipes, I will begin a new personal challenge (one that has my family already panicked), and write about it weekly as we progress. You'll have to click back over on January 1 to hear what the new challenge is - see I'm adding mystery to the blog also!

I've been contemplating pulling together some of the information on this blog in to a book format. I'd love your help on this project. There are almost 275 posts here, so willowing it down to what's most useful/helpful/interesting will be a challenge. If you have thoughts on that, please share. Also, Kid Friendly Organic Life is a mouthful and I'm searching for a simpler title. Ideas?

Wrapping up this year, I've decided to go with a top ten blog post list. These are posts that either a) generated a lot of discussion, or b) are ones that dealt with important issues or information that I want to be sure you didn't miss, or c) they are posts I thought were really great. Hey, it's my top ten list so I can choose it any way I want!

Happy Holidays dear readers. I can't thank you enough for honoring me with your time each week. KFOL is up to over 300 hits a week and should reach it's 100,000th hit this spring. May not seem like a milestone for bigtime bloggers, but for me and my little blog it is. Enjoy!

Top Ten Blog Kid Friendly Organic Life Blog Posts for 2012

10 Stop Junk Mail

9 Chicken Keeping Anyone?

8 Vinegar as Herbicide

7 Eating the 1%

6 Look at Those Bubbles Hon

5 It's Not What You Eat, But What you Eat Ate!

4 The Fly War

3 Me Thinks Thou Dost Protest Too Much

2 Home Ec Circa 2012

1 Families That Eat Together

Tuesday, December 18, 2012

Less Holiday Hassle and More Christmas Calm

This week’s post is supposed to be about keeping calm and peaceful during the holidays. Maybe that’s an unrealistic goal, but I do believe it’s a worthy one. In light of the past week’s events, perhaps it’s something more of us may strive for this year. 

Most of the pressure we feel at the holidays is expectations we put on ourselves. We want to create a perfect holiday. But sometimes we’re so busy pursuing that perfect holiday that we never get to enjoy it. Here are my suggestions.
 

  1. You don’t need to bake every Christmas cookie your mother did. I pursued this at one point in our family history. And you know what? I’m the one who ended up eating all those cookies and berating myself for it. The kids don’t like the ones with nuts on them anyway. Pick a couple everyone likes and stick with that. Or – don’t make any at all! Or better yet – let your kids do the baking (and cleaning up). 

  1. You don’t need to put up every holiday decoration you own, every year. Tone down the chaos and pressure a little. You can put everything up 'next year.' And if someone misses a particular decoration, direct them to the appropriate storage bin or shelf. At the end of the holidays make a separate box of all the decorations you don't really like. Mark it "Goodwill Holidays 2013". Next year, without opening it, take it directly to Goodwill. I finally remembered to do that last year and this year it felt awesome to show up at Goodwill with the box (actually boxes!). Decorating was simpler because I wasn't making faces at the things I always put up but never enjoyed. 

  1. Cut down on presents. No one needs all the stuff we give them. A few good gifts are much better than a ton of meaningless ones. And anything you run out to buy desperately from Rite Aid two days before Christmas most likely is not something anyone will want. I remember sending my husband on such a mission many Christmas Eves ago when I had finally finished wrapping and realized one of the kids have far fewer presents than the others. It was Rite Aid or the grocery store – everything else was closed. (These days that’s probably not the case, but I’d still avoid the last minute panic shop.) 

  1. Give stuff that doesn’t need to be wrapped – experiences and gift certificates can go in a nice card. If it comes down to the wire and you haven’t got a gift ready to go, create a coupon for an experience like a hike + lunch (for a friend) or a movie night with five friends at our house (for your kids). Most people will enjoy time with you more than anything you might buy and wrap. 

  1. If you need to wrap – used reusable wrap to make next year easier. See my post on this one. It truly revolutionized wrapping in this household. 

  1. Make time for quiet. I know you’re busy. I know your kids are noisy. I know you’re exhausted. But find five minutes of quiet to reflect each day. A great place to do this is in a dark room with a lighted Christmas Tree. Or outside. Or with an animal in your lap. Or standing in your children’s room while they are sleeping. Call it investing in Christmas Spirit. I promise it will make Christmas feel more like Christmas. 

  1. Make time for your kids. Read a Christmas book (even if they’re big kids – they’ll probably still love being read to). Ask them what holiday activity happened at school today. Go for a walk, shoot baskets, play music with them. Just be with them. Kids have more down time at the holidays. Take advantage of this. Your presence is the best present. 

  1. Enjoy your holiday food. Let go of the guilt. Make a moratorium on stressing over calories. Enjoy a Christmas cookie – slowly, savoring it. Don’t do anything else except eat that cookie. Or sip some eggnog. Yeah, I know it has sixzillion calories, but this is the only time of year you drink it. Even better – warm it up and add Bailey’s! Focus on the taste, the extravagance, and the sheer pleasure – or don’t eat it at all. 

  1. Sleep more. Go to bed earlier. Take a nap. Close your eyes for five minutes (not while you’re driving). Rest your soul. This is the darkest time of the year. If you were a bear, you’d be burrowed in your cave, so give in to your body’s natural inclination to sleep more and – sleep more! 

  1. Exercise every day. I know, I know. But do something. It’ll relieve stress, keep your guilt in check (remember how you’re savoring those cookies?), and give you energy. You need this. Make it a priority, even if it’s only ten minutes. Can’t find a parking place at the mall – perfect opportunity to get some exercise. Kids making you nuts? Take a time out on the treadmill or put on your sneakers and go for a hike. If nothing else, make more trips up and down the stairs.

 The holidays are a rich time of year. But it can also be a stressful time of year. Let go of some of that stress this year. Don’t worry so much about how the house looks or the kids look or the number of presents or the perfect holiday. Instead enjoy the holiday you’ve got. Truly enjoy it. Instead of wishing everyone a Happy Holiday, actually have one.
 
Postscript from previous blog: We decorated our Christmas Cookies with all natural dyes. There was much weeping and gnashing of teeth, but in the end they still looked great and, more importantly, tasted wonderful!

Wednesday, December 12, 2012

Dye-Free Christmas Cookies

Many moons ago when food dyes
 roamed free in our house
No holiday is complete without Christmas cookies. My children devotedly subscribe to this theory. Last year, somehow amongst the guests, gifts, and chaos of Christmas, we never got around to making Christmas cookies. You know the kind- cut in to bells and reindeers and stars and loaded with icing and sprinkles and candies. The store-bought decorations were so chock full of artificial ingredients, food dyes, and preservatives they last for centuries (I know this is true because we still have a container of silver ‘bullet’ candies that I purchased before I had kids).  

Early last January, my youngest child pointed out the travesty and accused me of depriving them of Christmas cookies! You’d have thought I’d sold off his legos and barbequed the cat. As soon as Thanksgiving concluded this year, maybe before the pumpkin pie even, he began his lament, “Last year we didn’t even make Christmas cookies!”    

This year we’re going to make Christmas cookies, I promised. We aren’t going to forget. But there is this part of me that doesn’t want to make them. I don’t want to watch as my children load up their delicious homemade whole-wheat sugar cookies with artificially colored and sweetened candies. I’m not that naïve. I do realize the toppings are the whole point of Christmas cookies. The cookies themselves are simply a conveyor for the forbidden candies that I never buy for my children the rest of the year. They revel in the colored sprinkles, M&M’s, and jimmies strewn atop dye-laden brightly colored icing.


So what’s a mother to do? I’ve made organic pop-tarts, cheezits, and chocolate chip cookies. I would find a suitable alternative. Chocolate chips, yogurt covered raisins, chocolate covered pretzels, and organic candy coated sunflower seeds are all well and good, but the real problem, the sticking point in all of this is the food dyes necessary to color the icing. My spoiled children are accustomed to having five or six different brightly colored frostings to choose from. How would I do this? It’s not like Easter when you can use onion skins for pink and yellow. Somehow I suspect they might complain if I dyed their frosting with onion juice. 

But what about cherry juice? Or apple juice? Grape juice? Blueberry juice? I turned to the internet and discovered there is a whole plethora of suggestions out there. So I commenced experimenting. I whipped up a huge batch of homemade buttercream frosting and I started coloring.  

We had cherries, strawberries, and blue berries in the freezer, so that was an easy start. I thawed them out and drained the juice. Pink! Lighter pink! Purple! But no red! The blogs on the internet claimed you could make red from beet juice. No beets in the cupboard. And really how red are beets? They’re really more a chartreuse. Cranberries crossed my mind, but it was time to move on to another palate.  


From top clockwise- strawberry, cherry,
spinach, blueberry, and carrot/orange (yes that
speck in the green might be an errant piece of spinach!)
Next I shredded carrots in my food processor and dumped them in a colander with some sugar (to draw out the juice) to drain. Orange was a big disappointment. I added real orange juice squeezed from an orange I found in the very back of the fridge. It was hard on one side, but it did have juice. The icing turned only a faint shade of peach which didn’t look orange at all unless you put something stark white next to it. The bloggers claimed that if you drained the juice from golden beets, you could get a bright yellow-orange. No beets here. They also suggested saffron. What?  

Green was the big challenge. I have a friend who makes smoothies with spinach and swears you can’t taste the spinach if you mask it with enough fruit. Would spinach juice work? I retrieved a bag of frozen spinach, thawed it and chopped it to oblivion in the food processor. Then I drained juice from the spinach and added it to the frosting. It created a lovely muted shade of puke green. One of the kids wandered through the kitchen during my spinach activity and passed the word. No one would try the green frosting besides my husband, who did so under duress. He declared it “tastes like frosting.” 

My colors do seem more appropriate for Easter, but at least we now have options beyond white without the help of artificial food dyes. My colors were pretty, if muted. And the bonus is that the icing is even yummier with strawberry juice! A note to anyone thinking of trying this at home – you’ll need to add more confectioners sugar when you add the ‘dyes’ or the icing becomes too runny. One more note – if you purchase juice for your dyes, be sure to check the labels because many commercially processed juices add food dye to achieve the optimum color. 

The success of my icing inspired me to make colored sugar. I had on my shelf some coconut and raspberry sugars I purchased from a local shop, so I figured I could mix any of my ‘dyes’ above with white sugar and make some of my own. I made some blueberry sugar, but decided against spinach sugar or carrot sugar. 

The real test will come this weekend when we apply my concoctions to our Christmas cookies. Personally, I think these will be the yummiest ones yet, but my children are skeptical. Sugar has the power to win over even the stubbornest child, so I’m taking bets on whether this year’s cookies will be decorated or not. To be continued….

Tuesday, December 4, 2012

Holiday Decorating on the Cheap

I have to begin this week’s post once again with a disclaimer: I am decidedly NOT a decorator. It’s not just that I don’t have any knowledge of decorating and have never even perused a decorating magazine; it’s that I have very little interest in the idea of decorating. Don’t get me wrong – I completely appreciate someone else’s ability to decorate a house or lawn or child. It’s just that I take no joy from my own efforts. In fact, I have nearly no interest in the idea of it.  

Occasionally, I do rally the troops hidden in my brain and carefully choose a new paint color or arrange a few flowers, but for the most part there is no theme, style, or strategy to the way my house, lawn, or children look. Although I do wish the lawn were decorated with a lot less garden jumble and child flotsam. The children prefer to decorate themselves without my assistance. (And they do seem to have a unique “style” all their own. My oldest was even a trend-setter in kindergarten when the zip off pants were all the rage. Each day at some point during the day, he would zip off the bottom portion of one of the legs of his pants. Not both, just one. This made him look like a pirate because his little white leg resembled a peg leg. It was cute until other children started doing the same and parents complained when pant legs were lost. That was the first call home from a teacher.) 

When it comes to holiday decorating, I’m even worse. Most of the time I just don’t see the need for it. I stick to minimalist efforts for the most part. I used to only put up Christmas decorations (most of which were wedding presents – what’s with that?). But then my children guilted me in to buying Halloween and Easter decorations. And then my youngest visited a friend who decorates as if her home is a finalist in Extreme Makeover: Holiday Decorating Edition. He came home incredibly disappointed in his mother’s meager efforts. Since then, I’ve tried to step it up a bit.  

Here are the guidelines for my holiday decorating:

  1. It has to be cheap (as in expense, not value).
  2. It can’t take up much room in the off-season.
  3. If it’s made of perishables, all the better.
  4. It has to be tasteful and/or meaningful.
With that in mind, I’ll share my best tips.

Supplies that can help:
-A big spool of wired red ribbon
-Evergreen branches (if you don’t have some in your own neighborhood and you’re local, feel free to cut some of ours. We have gobs of evergreen trees and I’ll even loan you my clippers.)
-A box of shiny ornaments (dollar store and walmart are good sources, although I found some at the Goodwill)
-Pinecones (These need to be collected through out the year. The ones lying around on the ground now are undoubtedly mashed and moldy)
- Christmas Cards (the ones that you receive in the mail)
- Children's Holiday Craft Projects (What? You didn't save them?!)


Tie pretty red wired ribbon on anything and it becomes a holiday decoration (including the dog). I’m pretty horrible at the ribbon tying, but this much I know – start with one end longer if you want your bow to be even and use wired ribbon because it’s incredibly forgiving and anyone can make it look good (even me).
 
 Utilize nature. It’s free. Evergreen trees and bushes are everywhere and they forgive a little trim this time of year.
 
 
Pull the dead stuff out of your porch pots.


Fill it with evergreen branches arranged artfully, tie a colorful ribbon on it, and set it on your front porch.


Add evergreens and a ribbon to a wreath you already have.


Attach greens to porch lights, mailboxes, signs (be careful not to allow them to touch bulbs).


Fill a bowl with bulbs, pine cones, candy canes or peppermints (if you use mints, tell your children they are fake or that they’re left over from five years ago so they won’t beg you for them on a daily basis. If that doesn’t work, tell them the dog had them in her mouth.). Again, add a ribbon if possible and it’s instantly festive.
 
 
Add white twinkly lights to anything – an old sled, a porch decoration you already have, a chair, a mirror, whatever happens to be lying around (not the dog).
 
 
Hang up your children’s Christmas crafts from years past. I love this one. It’s my favorite thing to put up each year. I love the fingerpainted wreaths made from their tiny handprints and get a sentimental chuckle out of their signatures on the back of each creation.
Find a clever way to display your Christmas cards. We tape them up as we receive them around the doorway in to the kitchen. You could also hang a string like a clothesline along a wall and clothespin them to the line. (no pictures because we haven't gotten any Christmas cards yet - C'mon people!)
 
One last idea that will not only decorate your house, but make you feel as thought you've got Christmas under control: Wrap the presents that aren’t for the short people in the house and place them in a nice decorative pile in a window, under the tree, or as a table centerpiece.
 
This morning it was nearly 60 degrees here. Bizarre, but lovely. I spent a half hour decorating my porch. It cost me $3 for the spool of wired ribbon which was on sale for half price. I spent $6 on a short string of white LED lights. Everything else was free. 

Bottom line: Holiday decorations don’t need to cost a fortune or take up half your basement. If I can do this, you can do this.


Wednesday, November 28, 2012

Give Them Something They Don't Have to Dust

I’ve been slacking off lately, what with the holiday preparations and all. Kidding. About the holiday preparations, but not the slacking off. In light of this realization, I’ve decided to dedicate the next four posts to holiday preparations – presents, decorating, food, and staying sane – in that order.  

What to give? I first need to preface this by sharing my philosophy that we all have plenty of “stuff”. Very few of us truly need anything. But many of us delight in giving gifts during the holiday. I would be one of them. I love to see the faces of my loved ones when they open my gifts. In fact, I even love wrapping the gifts. I keep extensive lists on my phone throughout the year of ideas I come across that would be perfect for a certain person. So I’m all about gift giving, but I’m fundamentally against stuff accumulating.

Here are my gift giving guidelines:

  1. The smaller the better (in size not substance).
  2. Perishables before permanence.
  3. Experiences are WAY better than anything you have to dust.
  4. You can never go wrong with books.
  5. It is ALWAYS the thought that counts.
So, with those thoughts in mind, I’ll share a few of my favorite gifts. Feel free to copy, adapt, or ignore.

  1. Charitable gifts. These are always a good idea because they are in line with all of my guidelines. But as I’ve said, I love the wrapping of objects and a small piece of paper proclaiming that money has been given in the recipients name, just doesn’t cut it. Here’s a few ways I’ve gotten around that:
-         Give used books along with a donation to any cause, one that promotes literacy if you like thematic gifts. I spent a year saving each book I read, underlining the parts I liked, making notes in it, and then affixing a post-it with the name of the person I thought would most like it so I’d remember come Christmas. I bundled the books up with a pretty ribbon and tag, with a note saying I’d made a donation in their name instead of buying new books.

-         Give a gift of animals through the Heifer Project along with cookies in the shape of the animal given or a drawing or clay figure representing the animal.

-         For teachers, give a bundle of pencils or package of paper clips (or just about any school supply, they can always use them) with a donation to an organization that promotes education. I did this last year for the I Have A Dream Foundation, and the teachers were truly touched. I did something similar for the music instructors with a charity that promoted the arts. 

  1. Family Picture gifts. These work because relatives, particularly grandparents, are happy to get updated pics. Besides the lovely framed photos, you can:
-         Make a bookmark with pictures, notes, illustrations of the kids, yourself, whomever would delight the receiver. Laminate it, punch a hole in it and add a decorative ribbon (you can add beads or charms to the ribbons for extra flair)

-         Calendar of family photos. This can be simple using an online service like snapfish, or fancy if you have the time to scrapbook each page. I’ve been doing this for years and since it easily eats up multiple days, it’s a gift of my time as much as the pictures. I enjoy the process and reflect on the faces in the pictures and the people I’m making them for as I create.

-         Family Picture Book. My sister-in-law gave my kids a small spiral bound blank book filled with pictures of their cousins doing all kinds of activities. Simple things like cooking, playing sports, and making funny faces. It was narrated and laminated. My kids enjoyed reading that book nearly every day for years. We still have it but it’s so mashed and stained, I didn’t want to post a picture because it wouldn’t do the idea justice. 

  1. Baked gifts. This is an old standby, but people always appreciate it, especially single, young, or elderly people who don’t have the inclination, time, or energy to bake holiday treats themselves.
-         Truffles are easy to make and always impress. Here is the recipe for Oreo Truffles (although I coat mine with white chocolate - much better). Every year I have given these, people beg me for the recipe. Disclaimer: this is in no way a healthy or organic gift!

-         Granola is a healthy alternative to cookies and candy. It is easy to make. I’ve posted my granola recipe in a previous blog post. Fill pint jars and cut a small piece of fabric or decorative paper to dress up the lid.

-         Bread is a simple and much appreciated gift also. I started doing this instead of candy for a friend who is diabetic, but everyone who has received a fresh, homemade loaf of bread has loved it. Easy to do, especially if you have a breadmaker (but I take the dough out and bake it in a traditional bread pan so it’s a normal shape and not that odd hat size loaf)

-         Infused Oils and Vinegars. This requires that you purchase an appropriate bottle, but they are relatively inexpensive and you can be fancy and paint on them or just dress them up with a ribbon. Recipes for simple infusions (rosemary olive oil, raspberry vinegar) are all over the internet, but most require only that you leave the additive in the oil for a period of time, so get started on this one soon if you want to give infused treats! 

  1. Experiences. These are my favorite gifts because they take up no space and they force us to go do something, sometimes things we’d never do if someone else didn’t pay for it.
-         Tickets to see plays, musicals, concerts given with a flyer for the venue or a small trinket that goes with the theme or a bag of popcorn (white-chocolate covered is my favorite!)

-         Gift certificate for bowling, ice skating, laser tag, mini golf, whatever floats your boat with a box of twizzlers, mittens, golf tee or something useful that is in keeping with the activity.

-         Prepaid lessons – guitar, sailing, archery, drawing, painting along with a guitar pick, sunscreen, pencils, etc.

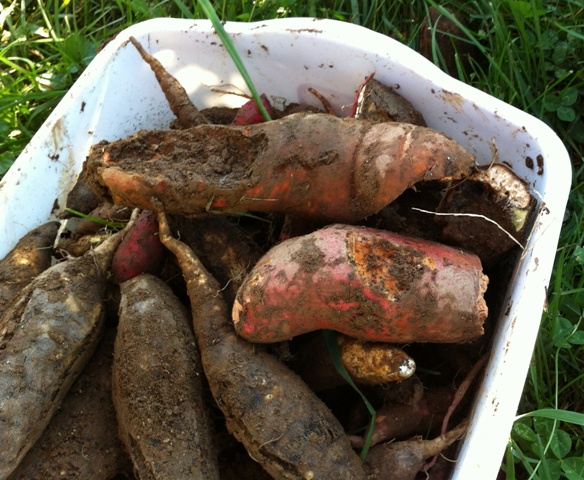
-         Subscriptions to magazines, wine-of-the-month club, flowers-of-the-month club, or better yet a CSA membership!

  1. Homemade gift certificates. I add this one trepidaciously (I think I invented that word!) because I am aware that many of these well-meaning certificates or coupons don’t ever actually come to fruition. I am in possession of coupons for clean rooms, dishes done, etc. which I’ve never been able to use because there always seem to be fine print involved (“I’m too tired,” “but I have homework”). Still, these are great stocking stuffers. I use them in our advent boxes (25 little boxes they open each day of advent).
-         Get-out-of-kitchen chores free for one night card

-         Ride to the movies for you and three of your friends (notice this is only a free ride, not a free movie)

-         Choose your own dinner coupon (must be redeemed at least 48 hours in advance of said dinner) 

I’m sure many of you have ideas about holiday gift giving. If you’d be willing to share them, please add them as comments on the blog site (rather than responding on Facebook or in e-mail to me as most of the comments come in). That way more people can read them. I know it’s an extra step, and who needs extra steps at this busy time, but think of it as your gift to the rest of us, or to the universe in general. 

One more comment I must add: Please consider using something other than paper to wrap your gifts. I posted about our simple fabric wrapping that saves time, money, and the planet. If you have other wrapping ideas, again please share them to the blog.

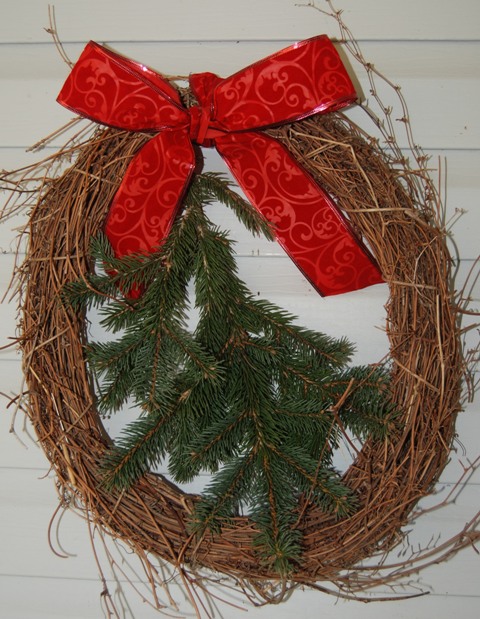
Next week: Simple holiday decorations that don’t blow the bank or take up half the basement in the off season.

Tuesday, November 13, 2012

One Person's Trash is Another's Treasure

This Thursday is America Recycles Day. I know you’ve already got your champagne chilling and your streamers ready (made from old magazines and newspapers I’m sure), but just in case you need some incentive to celebrate, I’ve prepared a little tribute to my favorite recycling organization. 

I couldn’t let this special day go by without highlighting my favorite recycling method – freecycle.org. If you haven’t signed on to the freecycle in your area, do it right now. I mean it. You can give away (“recycle”) just about anything – and I mean anything. Everything listed is free and local. How awesome is that?

I listed a big box of broken crayons and had eight takers within hours! Plastic fish-shaped candy molds – gone! VCR/DVD player that only works as a DVD player – too many takers to count.  

Recycling doesn’t always mean sorting your trash. It can also mean giving things away, or acquiring “recycled” items instead of buying new. 

I checked today to see what kind of gems were listed on my local freecycle and here’s a sampling of OFFERS:

 Hospital bed

Brother multi-function printer

Ranger Rick magazines from the late 70’s and early 80’s

Kids wooden play set (you dismantle and haul)

web Christmas lights

breast feeding supplies

white salt and pepper shakers

Danielle Steele books on cassette (now there’s an offer I can’t refuse…)

Golf balls (gotta love a thrifty golfer)

Stanley’s Dinosaur Round Up DVD

Kid’s wagon

Toaster Oven

 And even if you’re embarrassed to list some of the items you’d like to give away, there are people asking for them every day. Here’s a sampling from the WANTED list:

 1 ½ to 2 inch pipes in six foot or longer lengths (it’s good to be specific)

6ft christmas tree (no mention of real or artificial)

Women’s jeans size 4

Items for a cat (they weren’t very specific)

Craft items for kindergarten students (teachers lurk on this site)

Christmas Sweaters (honest – this was posted in the WANTED section!)

Fanny Pack (yes, this was too)

Canning jars (woman after my own heart, wish I’d known about this site before I bought mine!)

Pushable Lawn Sweeper (not sure what this is, but I’m betting if you have one in your garage behind the bags of stuff you keep meaning to drop off at Goodwill, you do)

Arm Sling

Freezer Burn Meat (truly, it says this) 

The WANTED list is how I got one of my best bread makers. I recently asked for Pampered Chef stoneware, but that must have been the limit. Nobody responded to my plea. Freecycle is moderated for sicko people and all posts have to be approved by the moderator before they appear in the feed. I’ve rarely met the people I’ve bequeathed my junk too. Normally we arrange via e-mail for them to pick the items up from my porch.  

When I picked up my breadmaker it was in an unmarked brown paper bag in front of a garage at a house that had no lights on. When we pulled up my husband was sure this was actually a drug deal. Great breadmaker, though. 

So celebrate America Recycles Day and recycle something besides cardboard and aluminum. Get rid of the items that are just taking up space in your life and pass them along to someone who will treasure them (or at least use them).

This is a great project for your kids. Maybe they can list some items to give away and then list an item they’d like to have. I’m sure someone has the Rockem’ Sockem’ robots in their basement or a paint-by-number set that’s never been opened collecting dust in a closet. It’s worth a shot! Freecycle is loaded with kids’ items. 

This is the bike I'm listing on Freecycle this week. Gently (or not
not so gently) loved, some rust, needs handle bars straightened -
great deal for the price! (FREE)
Teach your children how great it feels to give new life to old things. Talk to them about the importance of recycling. There is enough stuff for all of us already on this earth. Any time you have the opportunity to recycle or upcycle or precycle or whatever you want to call it, you’re making a play to preserve our planet. And that’s the most important reason to celebrate recycling on any day!

Tuesday, October 30, 2012

Families That Eat Together....

What time is dinner? Used to be my kids could count on a 6pm dinner hour every night. If they were home. Some days all five of us ate together, but most days we ate in shifts. Whoever was home at 6 ate then, and everyone else warmed something up later. But then this year I messed everything up. At least for my daughter who prefers that we eat between 5 and 7 (when her computer is shut down by the computer gods). These days dinner might be at 5:30 and it might be at 7:30, it’s even ended up being 8pm (“think of it as European…”).

What’s brought this change? Possibly my middle-age panic that I’m missing out on what’s left of my kids’ time at my table. And possibly the fact that there are too many people going in too many directions every afternoon and it’s become difficult to figure out what I can cook in 15 minutes between car pools that will still be good 90 minutes later. 

Now we eat together. Except for Thursdays. Thursdays are “Fend for yourself nights”. That evening was just too complicated to find a common dinner hour. Mondays mean band rehearsals and drum lessons, so we eat at 7:30pm. On Tuesdays we eat early at 5:20 before soccer and bass lessons. Wednesdays is an after-practice meal at 7:15. Fridays we have to follow practice with Pizza Night at 8 (cocktails at 6:30). Saturday and Sunday nights are the only days we come close to our habitual 6pm feeding. The kids are adapting. And amazingly, it’s working. 

And now a recent study has revealed what I must have instinctively known all along. Family meals make your family healthier. Rutgers University recently evaluated nearly 70 studies to gather information about the benefits of families eating together at home. The studies revealed that families who eat together have a healthier diet and consume less junk food. Plus teens who eat at home with their families show fewer signs of depression. And all family members are more likely to have a healthy weight.  

40% of the typical American food budget is spent on eating out which makes me wonder how many of us are eating together as a family around our dinner table. This is a no-brainer. You can save money, be healthier, and help your kids by cooking and eating at home. Okay, I hear you now. But how do we get a healthy meal on the table when we’re busy with work, volunteer commitments, and shuttling kids to and from all of their activities?  

No, I don’t have an easy answer. But I have a few helpful suggestions.

  1. Create a family meal book. Ours is a looseleaf binder with menus and recipes that most everyone likes. Half the time (at least for me) it’s the challenge of thinking of something to eat that slows me down. Two of my kids prepare a meal each week, so they consult this book when they do their meal planning. I regularly add new recipes I discover in my travels to prevent it from getting too boring.
  2. Keep staples in stock. Our freezer will always have ground beef, homemade broth, fish, veggies, fruits, meatballs, and chicken tenders in it. These are the ingredients that the kids need to make meals. You will also find fish sticks, French fries, hot dogs, and flour tortillas for nights when dinner has to be quick and easy. Our pantry is always stocked with pasta sauce, olive oil, good vinegar, applesauce, soup, crackers, beans, ketchup, pasta of every shape and size, rice, potatoes, garlic, and onions. Because I know these things are there, I can cook confidently and the kids have what they need when it’s their turn to cook. Your pantry would probably look different – take your cue from your recipe binder.
  3. Keep a good shopping list posted where everyone can add to it. Ours is on the side of the fridge. The system is – if you open the last one, add it to the list. That goes for anything – can of beans, bottle of ketchup, jar of jelly, clove of garlic, paper towel roll. This system makes my life easier. I don’t have to try to remember everything we need. The only time it fails is when I forget the list when I go to the store.
  4. Keep meals simple. You don’t have to have a fancy meal for it to be healthy. For us it’s typically – some kind of protein, one carbohydrate, and two veggies or fruit. Done. I can get a healthy meal on the table in five minutes or two hours, depending on my day’s options. Cheese & bean burritos, corn, and applesauce is a five minute meal.
  5. Utilize your crockpot. Everyone’s got one. At least everyone who ever gets married. I got three for my wedding. Nothing reduces stress like knowing dinner is ready to go the moment you walk in the door. A few of my favorite crock pot meals (e-mail me for recipes or check the recipe link on the blog) – Beef Stew, Meatloaf, and Lasagna. I can get all of these ready in the morning and come home to dinner ready to go. The internet is bustin’ with crockpot recipes, blogs, even websites so get your pot on!
  6. Get everyone involved in making the meal happen. Every day my kids have either “set, clear, or dish”. This makes getting a meal on the table much more feasible. It also underlines their investment in our meal. We have a chalkboard mounted on the wall near the table which lists who has which job. I recreate the board each week based on who will be home to set the table and whose schedule would make dishes a better option.
  7. Make eating together a priority. My kids fussed when I initiated this new practice. I ignored them. If they were hungry and dinner wasn’t for two hours, I pointed them towards the baby carrots and dip or I opened a jar of applesauce. I did not cave. It only took a few weeks for them to get the message. Remember – You’re the adult here. You get to make the rules.
  8. I’m sure this is implied, but when you gather for a family meal, turn off the TV and leave the electronic habits elsewhere. Focus on being together.
  9. One last idea here – once you’ve got them all sitting round the table, encourage the conversation. I have a friend that asks her kids to tell them one good and one bad thing that happened that day. My kids like to ask if anyone has new jokes (there seems to be an endless supply if you attend a middle or high school). I like to ask them one thing they learned today. At first it garnered sarcastic comments like, “the corn dogs in the cafeteria are gross”, but now I get much better answers. If necessary make a few rules like “No talking about minecraft at the table” (they would have conversations that lasted the entire meal and my husband and I had no idea what they were talking about.)
Like any change, it takes awhile to make this happen. But it’s worth it. Don’t take my word for it, take Rutgers’. Here are a few comments from the newsletter highlighting their findings: 

A study by the National Center on Addiction and Substance Abuse at Columbia University showed that teens who take part in regular family meals are less likely to smoke, drink alcohol, or use marijuana and other drugs. 
Studies have also shown that children and teenagers tend to have better grades when their families have dinners together at least five times a week. The Columbia University study showed that frequent family dinners were associated with better school performance, with teens 40 percent more likely to get As and Bs. 
Kathleen Morgan, chair of Rutgers Family and Community Health Sciences, states that having healthful meals during the transition from early to middle adolescence impacts the development of healthy eating behaviors for youths. Morgan claims that the period from 12 years to the late teens is "one of the most dynamic development periods in a person's lifetime, and habits established in this time frame are more likely to last." 
Miriam Weinstein, author of The Surprising Power of Family Meals, reflects that "family supper is important because it gives children reliable access to their parents. It provides anchoring for everyone's day. It emphasizes the importance of the family." 

I think that last comment is the one that most resonates with me personally. Our family meal anchors our day. All five of us are going in many directions all day long. We’re encountering people, teachings, and media that offer conflicting messages about life, values, and the choices we make. It’s good to come together near the end of each day so that we can process what we’ve heard, seen, and experienced with people who love us and support us no matter what. After being disconnected all day, it’s a few precious minutes to reconnect.

Tuesday, October 23, 2012

WANTED: Frustrated Beekeeper

Again this year I was crushed when my beautifully blooming fruit trees fail to produce more than a handful of fully grown fruit. The hillside is resplendent in the spring as the nectarine, apple, plum, pear, and peach trees blossom. But the only fruit produced are a few meager strugglers who are subsequently the only available target for the birds and bugs that summer brings. And yet we mulch and feed and prune and hope.  

For several years I’ve been convinced it’s the bees that are doing it, or not doing it, as is the case. A neighboring farm had busy bee hives just over the hill from us when we first planted our trees nearly ten years ago, but those hives disappeared like so many others did and since then it’s my hypothesis that my trees are blooming but no one’s doing the pollinating. Beautiful blossoms, plenty of leaves, but no fruit. 

Bees are what we need, but while I’m game for most any agricultural endeavor, I draw the line at bees. I don’t have the time, the energy, or the courage to keep bees. And ask any member of my family – I haven’t got time for any more hobbies! So for the past few years I’ve been searching for a frustrated bee keeper. Surely there is someone out there living in an apartment or townhouse or neighborhood association-regulated home who has a life long dream of keeping bees but no where to do it. I’ve asked every honey vendor I’ve encountered at craft shows only to be given a curious stare and then a sales pitch on how I should do it myself. I’ve e-mailed beekeeping associations and gotten no response. 

Finally, a few weeks ago at our farmer’s market a new honey vendor showed up. I approached him like all the others and low and behold he said – “You’re just the kind of person we’re looking for!” I was ready to do a snoopy dance of joy, but calmly listened to him tell me about the Honey Bee RestorationProject. If your property is suitable, they’ll install hives, maintain them, and split the honey with you! Wow – what a sweet deal! We’re currently waiting for our site inspection and ever hopeful that new hives will arrive in the spring. 

Honey bees have been struggling to make a comeback from the mysterious hive collapses that have effected up to 90% of feral bees and 35% of domesticated hives all over the world. Honey bees are responsible for 80% of all insect pollination, so their loss could mean devastating effects for the world’s food supply. Even without keeping bees yourself or inviting someone to keep bees on your property, there are things you can do to help the bees. Here are just a few suggestions: 

  1. Buy local honey. This supports the small beekeepers so that they can continue to care for local hives and make a profit. I’ve always heard that eating honey grown close to your home helps you to develop a strong immunity to local allergens. Makes sense. Besides that, local honey is fresh and tastes amazing. I just tried some local raw alfalfa honey that blew me away. Such a treat!
  2. Plant bee-friendly plants like allums, mints, beans, any kind of daisy-like flower, asters, hollyhocks, sunflowers. The bees just love our raspberries which is probably why they are always our most prolific crop.
  3. Teach your children about the importance of the honey bee. My kids know better than to swat at a honey bee. They are welcome guests here. Learn about honeybees yourself and then help your kids to identify them. I personally think they are the cutest of the bees, with their fuzziness and delicate size.
  4. And you know I’m going to tell you to not use pesticides. This especially includes Chemlawn and the like. This broad spectrum pesticide use kills not only weeds, but honey bees and the plants they survive on. Dandelions and clover are a favorite delicacy for the bees. I look across our yard and don’t see a weed-ridden expanse, but a bio-diverse honey bee smorgasbord. One boon of such inclusive attitude is that when drought strikes and all the beautiful lawns turn brown, my yard (truly you can’t call it a lawn) remains green, native grasses and “weeds” being much tougher than the exotic chemically-dependent grasses.
  5. The Apex Bee Company is a local company that lets you foster a hive for a small fee. What a great investment in local agriculture and a life lesson for your children about the importance of honey bees.
My husband’s new favorite joke is that our pony, Shoebee, is going to get very tired of hearing his name yelled all day throughout the summer. Not me, I won’t shoo any honeybee here to work. I’ll gladly trade a few inadvertent stings for a homegrown golden delicious!

Tuesday, October 16, 2012

One Potato, Two Potato, Sweet Potato, VOLE!

All summer long I raved about my sweet potatoes. I’d put more in this year than ever and they look vibrant and healthy, sprawling over the garden edges in a gorgeous show of green with hints of purple. This past week, I decided to dig a few and make sweet potato fries on the grill. The presence of both cats, sitting like vultures on the border of the garden as I began to dig should have been my first clue that something was amiss. As soon as I began to dig, they began to pace and prowl. The first potato I dug looked gorgeous! From one side. The other side was completely eaten away by some underground thief. After a few more turns of the shovel, the older cat pounced and quickly darted away carrying a limp brownish-gray figure. Voles. Ugh. The rest of the dig went much the same way. Great day for the cats, not such a great day for me. 

I salvaged what I could because sweet potatoes are one of the nutritional powerhouses that I try to pack in to as many meals as I can. They contain beta carotene, vitamin C, iron, potassium, fiber and complex carbohydrates, to name a few of their benefits. My children shrink from their oddly sweet taste, just as I did when I was a child. Vegetables aren’t supposed to taste sweet, or so I thought. It wasn’t until I became an adult that I discovered what a boon they are – yummy, sweet, healthy, and relatively low in calories. I tricked my own children in to eating sweet potato fries by growing white sweet potatoes one year. I sliced them up, tossed them with grapeseed oil and flaked salt, and grilled them to perfection. The kids thought they were especially delicious fries. I clued them in after two or three meals and now they’ll eat sweet potato fries even if they’re orange. 

One of the challenges of growing sweet potatoes for me (besides the new challenge of a resident vole colony), is figuring out how to cure them. They need hot, humid temperatures for a few weeks to cure so that they’ll last through the winter. Heating with wood makes our house relatively warm, but not at all humid. Last year’s sweet potatoes lasted until January. This year I’m trying a new trick, suggested by the sweet potato queen and king who live just around the corner (more about them later). I’ve double wrapped them in newspaper and have them nestled in a warm corner. We’ll see what happens.

The vole-damaged potatoes, I’ll cook up and make in to a mash to freeze. Then I can use them for sweet potato pie, bread, and the favorite in this house – sweet potato pancakes. 

The chickens are currently digging up my sweet potato bed eating grubs and ruining any of the remaining vole tunnels. I’ve yet to decide on a battle plan for next year’s voles, but would welcome your ideas. 

Lucky for me, the Pennsylvania Sweet Potato festival is held just down the road. My daughter is a regular volunteer, working for sweet potato pancakes. I joined her this year and tasted a few of the sweet potato pies (vanilla, chocolate, blueberry). Bev and Jack Osman host the sweet potato festival on their beautiful farm in Stewartstown PA. You can dig your own sweet potatoes or buy them already dug. The sweet potato theme carries through the day with music, crafts, and lots of sweet potato food. I should have written this post a month ago to remind everyone, but be sure to watch for the festival next year.  

Locals can learn about sweet potatoes and many other wellness topics by attending classes led by Bev and Jack this fall at the Wellness Center at the farm this fall.
Stopping by their stand at the farmer’s market this weekend, I picked up a brochure entitled, “Sweet Taters for Your Little Tots” full of ideas to help you raise sweet potato lovers from an early age. I wish I’d tried a few of these tricks when mine were still malleable. Here’s a few of the suggestions: 

  1. You can easily make sweet potato baby food by baking a sweet potato at 450 for 25-30 minutes and then scooping out the potatoes and pureeing them.
  2. Sweet potatoes can be diced in to finger food, microwaved a few minutes and served with a side of yogurt for dipping.
  3. Add sweet potato puree to the cheese sauce in mac n cheese.
  4. And of course, make fries out of them.
Now’s the time to stock up on local sweet potatoes in season to eat all winter long. Just be sure to buy cured sweet potatoes, or cure them yourself in a warm bathroom. 

I’ll be experimenting with adding sweet potato mash to many meals this winter, since I’ve got a freezer full. If I stumble upon any masterpieces, I’ll be sure to let you know.


Tuesday, October 9, 2012

Yes, My Darlings, I CAN Make Pop-Tarts!

Poptarts! I made pop-tarts! (Actually they’re “Toaster Pastries” my helpful hubby informed me. “Pop-Tarts are trademarked.”) Either way, this week I made delicious blueberry toaster pastries! The holy grail of my organic life with kids!  

As a child, I remember the yummy taste of pop-tarts, and when I had my own kids they were one of the first treats granted to them as toddlers. They loved the cinnamon ones best, just like I did, even burned. When we “went organic” as the kids call it in tones reminiscent of the phrase, “when we were strapped to the rack and tortured daily before being forced to eat things only a rabbit could love,” I discovered what a pop-tart is made of and that was the end of the pop-tart era at our house. 

Not long after, we discovered organic toaster pastries, but they were expensive and mean ole’ mom wouldn’t buy them except for special occasions (eternal car rides, weekends that mommy and daddy went away with out them, shots at the doctors). Since then my kids make a point of telling me about the Pop-tarts they eat at their friend’s houses. Another of their subtle reminders of how hard they have it. I’ve managed to make bagels, ice cream, and cookies that are better than the brand names, and my homemade cheezits are getting better with each attempt, but pop-tarts – I never thought they were possible. 

I discovered this recipe for Toaster Pastries at the library. I was perusing the new nonfiction while my son agonized over which Garfield books he would take out this week, and saw a cookbook with a picture of pop-tarts on the cover. Hmmm… It was titled the Homemade Pantry:101 foods you can stop buying and start making. The friendly text and plentiful pictures assured the reader she could do this, saving money and increasing the nutritional value in the process.  

My first thought was not a pleasant one. Damn! I could have written this book! Why didn’t I think of it, I’d be published! Still, I picked up the book looking for more tricks and treats. The pop-tart recipe looked simple and I could make it healthier by using whole wheat flour. The cheez-it recipe was different from the one I keep tinkering with, so I dog-eared the page and checked the book out.  

Homemade Pantry is a delightful read full of quirky sub-titles and stories of the author’s family. I grumbled quietly as I read, impressed and intimidated by the author’s clever format. Many of the recipes are very similar to my own. Great cookbook though, I do admit. 

I know you’re dying for me to tell you how to make your very own toaster pastries, so here it is (with pictures!) 

Make a basic pie crust. There is a recipe in the book, but I used MarkBittman’s recipe and substitute half whole wheat flour because it’s super easy and absolutely delicious.

Basic Pie Crust
 
1 cup, plus 2 Tablespoons flour

8 Tablespoons butter, cut in to pieces

½ teaspoon salt

1 teaspoon sugar

3 Tablespoons Ice water

Place flour, salt, and sugar in food processor. Pulse several times to mix. Add butter and process long enough for it to begin to look crumbly. Place flour mixture in bowl and add ice water. Use your hands to work it in to a ball, don’t over work it or your crust won’t be flaky and light. Wrap in plastic wrap and place in refrigerator for at least 30 minutes.

I doubled the recipe and ended up with twelve toaster pastries.  So I would assume that one pie crust recipe equals six toaster pastries.
 
Toaster Pastries
When your crust has been chilled long enough to make it workable, roll it out in to large sheets and cut out rectangles the size of a toaster pastry ( I might try making them a bit smaller next time). Use flour to keep the dough from sticking to the surface or roller (or your fingers). Place pastries on nonstick or well-greased baking pan.

Paint the pastries with egg mixture (one egg plus one tablespoon water mixed together).

This amount of filling was a little too generous!
It made for lumpy toaster pastries, but if you're
not interested in toasting them, lumpy is good.


Place one tablespoon of filling in a thin line down the center of the pastry. I used blueberry jam, but you could choose anything you like in your toaster pastry. I think it would be really great to make a savory version with spinach and cheese or tomato, feta, and black olives!

 Roll out the rest of the dough and cut in to rectangles for the tops. Paint with egg mixture. Seal the edges of the pastry using a fork and then poke the top two or three times.

Bake at 375 for 15 minutes. Total yum.


After they have cooled, sprinkle with confectioner's sugar or top with icing. I went for the sugar instead of icing, much to my children's dismay, but there's already plenty of sugar in these babies!


See the delight in my child's face as he reaches for a pastry! (Actually he already ate the pastry, I just made him pose for this picture, promising him future toaster pastries)